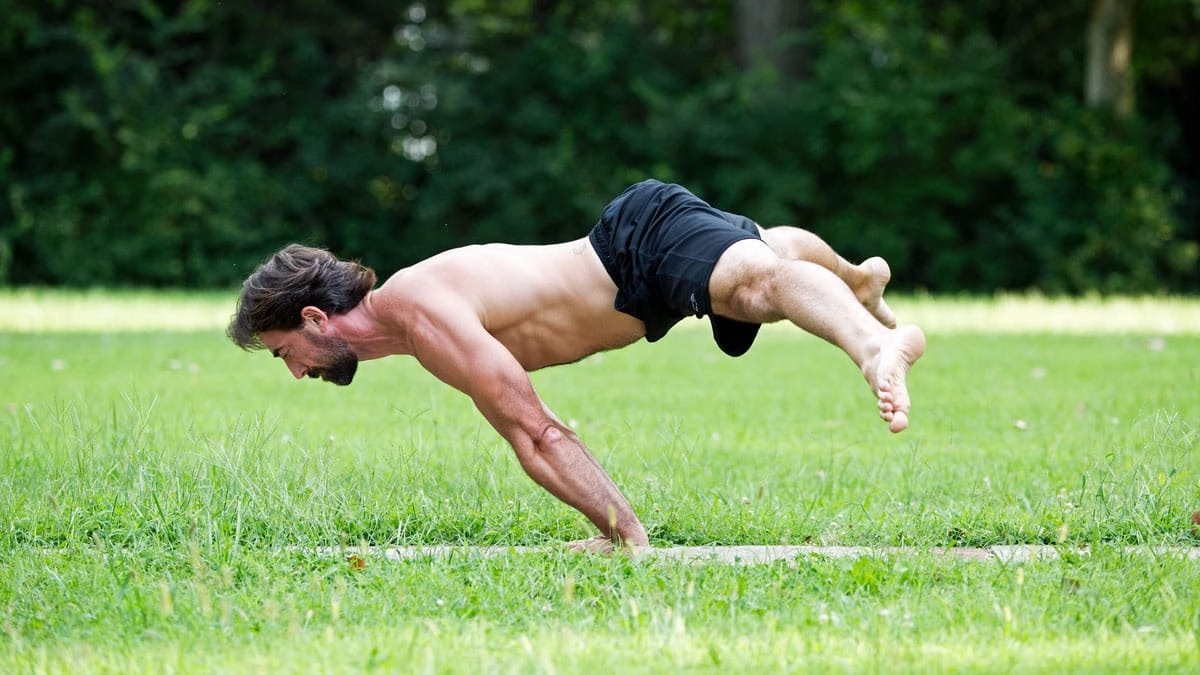
I hate to break it to you but it’s best to get it out of the way right now:
Most people will never hit a full planche.
And that’s fine! It really is and I’m not saying it to discourage you since you’re obviously interested if you’re bothering to read this article.
Because even if you never nail the full planche, what you get from training toward it — control, strength, and unshakable joint integrity — matters far more than whether you get a 10.0 from gymnastics judges.
The planche isn’t just a party trick. It’s a demonstration of what you and your body can do. The total body strength shows how hard you’ve worked and it’s honestly admirable to get any variation of a planche.
Training for it pushes you to understand how your body moves as a system, instead of just parts attached to each other. There’s no arm and leg day separation in planche training. Planche day is a whole body day!
Unfortunately most traditional planche training is punishing and rigid, forcing you to choose between progress and joint health. Here’s where our approach frees you from those chains.
Should You Even Be Starting Planche Training Right Now?
Let’s keep the honesty rolling: is planche training really what you need right now? Maybe. But it’s worth asking a few tough questions first. This isn’t a dig, it’s just smart training.
The planche is not for you if:
- You’re dealing with something more urgent, like injury recovery or weight loss.
- Your goal is to build general strength before diving into advanced skills.
- You’re brand new to hand balancing and still getting your bearings.
- Your wrists aren’t too happy about holding your full bodyweight yet.
If any of that sounds like you, no big deal — that just means your focus should be on the fundamentals that’ll actually make planche training smoother (and safer) later on.
Elements was made for exactly this. It builds real-world strength, mobility, and control without overwhelming your body or brain. Then when you’re ready to come back to the planche, you’ll be primed to make it count.
Already past the basics? If you’ve got solid wrist tolerance, a stable plank, and you’re comfortable bearing weight on your hands, Integral Strength builds the straight-arm pressing and scapular control that directly feeds planche work. It’s the closest thing we offer to a planche prep program, and a lot of our clients have hit their first tuck planche while running it.
Strength Without The Stupid: How We Approach the Planche

We train for real-life, long-haul capability – and you should too. It does you no good to post a planche pic on Instagram but you’re too wrecked to keep training a week later.
Planche work, done our way, won’t grind your wrists into dust just to hit a pose. It builds strength and control that carry over to everything else — from pressing up into a handstand to lifting a couch without wincing.
Here’s what our method blends:
• Wrist and shoulder resilience (because if they’re not ready, nothing else matters)
• Core and scapular control (aka your anti-flop toolkit)
• Playful patterning and exploration (so training feels like something you actually want to keep doing)

We’ll get into the tutorial portion of this post now, and I’ll walk you through how to specifically train for the planche. You’ll see that there are quite a few steps to follow to get to the planche, but don’t get overwhelmed.
Just take it one step at a time, be consistent and patient, and you’ll make great progress.
Build the Base Then Go Big
A lot of folks jump straight into planche drills thinking they can muscle through. Then they wonder why things stall — or snap.
That’s why we start by building a solid foundation: wrist prep, shoulder stability, scapular control, and total body awareness. It might not look like planche prep at first — but looks can be deceiving. Without this groundwork, you’re just stacking stress on dysfunction.
Here’s how one of our clients put it:
“As an active individual with extensive knowledge of anatomy and physiology, I wondered what Elements had to offer me. I wanted to learn advanced calisthenics and tricking skills — could going back to the basics really develop my coordination and autonomy beyond what I’d learned on my own? The short answer is an emphatic yes… I found myself achieving great success with skills I’d struggled with in the past (including handstand holds, tuck handstand, tuck planche).”
Once that foundation is built, layering in straight-arm strength and bodyline awareness is like icing on the cake. It unlocks a level of adaptability most training never even touches.
Planche Fundamentals – Body Positioning and Tuck Planche Progressions
If you try to brute force your way to a planche, your body will punch you right back! With pain, plateaus, and a whole lot of “I told you so’s”.
Planche training demands patience and precision. You’ve got to prep the right tissues, strengthen the right connections, and learn the positions before you earn the holds.
That starts here.
Start With The Setup
The wrists, shoulders, and scapulae all take on a serious load in this training. And thanks to the leverages involved, even small positioning errors can multiply that stress into something your body isn’t prepared for in that moment.
In the video below, we share the details in body positioning that can make or break your planche work — including what to avoid.
We’ll then demonstrate how to work toward the tuck planche, your first real milestone on the way to a full planche.
🎁 Wrist prep, shoulder stability, and the foundation work that actually makes planche training stick. Get our best methods free. Just tell us where to send it.
Body Positioning Fundamentals
 These are your starting cues. As you progress, some of them will shift, but this is the baseline for safe and effective positioning:
- Elbow pits facing forward.
- Shoulders pulled down as you lean forward.
- Fingers forward or angled outward, heels of the hands elevated if needed
- Arms locked and actively pressing into the floor
You may notice I didn’t even mention the legs here. That’s because the leg position will change quite a bit with each progression.
Tuck Planche: Where It Begins
The tuck planche (aka the “floating crane”) is the first major checkpoint. It builds the structural strength and positional awareness you’ll need for everything that comes next.
Use the chart below to find your starting place and level up one step at a time.
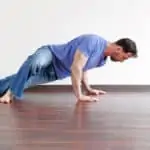
| 1. Basic Planche Lean | Start in a basic plank position and lean your body forward until your shoulders are in front of your wrists. Work on this position with your toes curled under, as well as coming up onto your toes. |
| 2. Straddle Planche Lean | Widen your legs so that they are in a straddle position on the floor. Lean forward, keeping your toes on the ground. |
| 3. Raised Planche Lean | Raising your feet onto a chair, box, or any other raised surface, repeat the instructions for #1. |
| 4. Raised Planche Lean with Bent Legs | Move your raised surface closer to your arms so that you can bend your legs from the raised surface as you lean your body forward. |
| 5. Crane with Raised Feet | Placing just your feet on a raised surface, tuck your knees into your arms, so that you are in a supported crane position. |
| 6. Full Crane Pose | Now, you'll go into a full crane pose, with your knees supported by your arms, and your feet up in the air. |
| 7. Crane with One Floating Knee | From a crane position, practice taking one knee off your arm at a time. You can practice this on the parallettes if it is easier or more comfortable. |
| 8. Floating Crane (Tuck Planche) | Once you're comfortable with pulling one knee off your arms at a time, start to work on pulling both knees off, coming into the floating crane pose. |
| 9. Straddle Planche Lean into Tuck Planche | Another way to work on getting into the tuck planche is to go from the straddle planche lean and work on first lifting one leg off the ground at a time, then tucking one knee into your chest at a time, and finally, pulling both knees into the chest, coming into that tuck planche. |
Once you’ve built consistency here, you’re ready to chase the straddle planche.
Time to Straddle Up – Variations and Progressions to Get You There
Once you’ve built up consistency in the tuck planche, it’s time to move into the straddle variations, and this is where things really start to get interesting.
Unlike the step-by-step approach of the tuck, progress here is a bit more fluid. That’s not a bug, it’s a feature. There are multiple effective ways to build strength and control toward the full straddle planche. You don’t need to follow a strict linear sequence.
Try each of the exercises shown in the video below. Find what feels doable and productive for your body. Then choose two to focus on at a time — no more, no less. Stick with those for at least 3 weeks, then reassess and rotate in new variations as needed.
Here’s a breakdown of the variations covered in the video:
| Straddle Open Tuck Hold | Starting in the tuck planche, pull your knees apart and hold. |
| Tuck Push Back to Half Straddle | From the tuck planche, push your knees apart and back into a half straddle. Repeat. |
| Tuck Push Back to Open Tuck Planche | Start in a tuck planche, then move your knees back until they are floating in an open tuck planche. |
| Tuck Push Back to Single Leg Planche | From the tuck planche, push one leg back into a single leg planche. |
| Tuck Push Back to Straddle Planche | From the tuck, straighten the legs into a full straddle planche. You can work on these with a pause, a longer hold, and/or repeats for conditioning. |
The key here is consistency, not variety for its own sake. Play with options, but don’t switch too often. Let your body adapt, then challenge it again!
Helpful Tools: Parallettes, Bands, and a Buddy
You don’t need special equipment to train the planche. But if you’ve got some tools handy — and you know how to use them — they can make a real difference.
The video below walks you through how to incorporate tools like parallettes, resistance bands, or a training partner into your planche practice. Think of these as helpful ways to change it up a bit, they aren’t magic pills but, used well, they can help you understand positioning, reduce stress on your joints, and get more productive reps in.
Use what you’ve got, there’s no need to special order equipment and clutter up your training area. This is just about making the work fit you — not the other way around.
Advanced Planche Exploration
This is the part where things look wild and probably a bit out of reach for now. And that’s okay.
The advanced variations shown below aren’t here to set some unrealistic benchmark. They’re here to show what’s possible when you train with consistency, creativity, and care.
Our lead trainer, Junior Vassiliou, didn’t get here by chasing reps or maxing out every session. He built these skills over time, with a deep foundation and a method that let his body adapt.
There are many other advanced variations but those included in this video are:
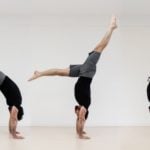
- Handstand Lower to Planche
- Open Tuck Push Back to Single Leg Planche
- Top Position Pull to Straddle Planche (on the parallettes or rings)
- Floor Tuck Push Back to Straddle Planche (repeats)
- Straddle L Pull Back to Straddle Planche (on parallettes)
- Single Leg Tuck Pull to Single Leg Tuck Planche (on parallettes)
- L-Sit Push Back to Full Planche
Making Planche Progress Without Breaking Yourself
This isn’t the kind of thing you can just tack onto your usual workouts. Planche work is intense! Not just on your joints and tendons, but also on your nervous system and your motivation.
So if you want to train it effectively and stay in one piece, you’ll need a plan that respects both your limits and your goals.
I suggest spending at most 3 days a week. After 2 months of practice you can add another day of training, and after about 4-5 months of consistent work, you’ll understand enough about your body to be able to wave intensity levels for daily practice in this training.
Common Obstacles in Planche Training
Even with smart progressions, planche training comes with its share of roadblocks. Here are a few of the most common — and how we help you work through them:
1. Your Wrists Start to Bug You
Why it happens: Lack of prep or overuse from pushing planche leans too soon.
Our take: Your wrists are doing serious work here. We build wrist prep directly into Elements and show you how to adjust intensity based on daily readiness. No need to max out every time you train.
Try this: Add 5 minutes of wrist mobility before each session. If pain shows up, scale back to supported variations or reduce load instead of pushing through.
2. You Grind the Same Hold Until You Hate It
Why it happens: Believing more reps equals faster gains.
Our take: Straight-arm work is intense. The connective tissues need time to adapt or you risk stalling — or worse, injuring yourself. That’s why we use weekly variation and practice cycles in our method.
Try this: Rotate between planche holds and pulling work (like front levers). Insert a mobility day before your hardest sessions to recover stronger.
3. Your Shoulders Can’t Keep Up
Why it happens: Focusing only on arm strength and holds while ignoring the scapula.
Our take: The shoulder blades are your foundation. Stable and mobile scapulae allow you to generate force safely and maintain form under load.
Try this: Incorporate scapular push-ups and holds in protraction. Focus on active engagement in every rep, not just position.
4. You’re Just Not Feeling It Anymore
Why it happens: Progress can slow, especially as you move into tougher holds. It’s easy to burn out.
Our take: That’s why we build Play into every program. Movement shouldn’t feel like a punishment. It should invite curiosity and expression — even when it’s tough.
Try this: Designate a day for low-pressure exploration: flow with Frogger or Monkey, or combine holds into a mini-challenge. Keeping it fun keeps you consistent.
Here’s What a Smart Planche Workout Looks Like
Here’s the fundamental session template we use with our clients:
- Starting at the lowest level, work up to 5 sets of 20 seconds, resting 2-3 minutes between sets.
- When you can perform an exercise with good form for those 5 sets of 20 seconds, go ahead and move on to the next level. It may seem much harder than the previous level, but still “workable.”
This may sound a bit vague, but as you get more experienced in your training, you’ll know exactly what I’m talking about. Let’s say you’ve worked up to holding the Raised Planche Lean with Bent Legs for 20 seconds across 5 sets. Here’s how to build a productive session from that:
1. Warm-Up With What You Know
Start with 3 warm-up reps of the Raised Planche Lean with Bent Legs:
- First rep: short hold
- Second rep: hold a bit longer
- Third rep: full 20-second hold
2. Test the Next Progression Up
Move to the Crane with Raised Feet. If it feels challenging but “doable,” great — that’s where you want to be.
- Do 3–5 second holds
- Keep it clean — stop before form breaks down
- Aim for up to 8 sets with full rest between
3. Drop Back and Lock It In
Go back to the Raised Planche Lean with Bent Legs for 5 sets of 10-second holds. You’ll be more fatigued now, so expect to scale back. Keep technique sharp.
4. Optional: Finish Light
Still feeling fresh?
- Drop down another level (like the basic Raised Planche Lean)
- Or do a few assisted holds using bands, parallettes, or a partner
If you’re cooked, stop there. Don’t force volume on tired joints. Save the high-energy push days for when you’re really feeling it — that’s when the big gains happen.
In Summary:
- Warm up with your current progression
Do 3 slow reps — short hold, medium hold, then up to 20 seconds on the last one. - Try the next progression up
Shoot for 3–5 second holds with great form. Do up to 8 sets, resting well between. - Drop back to your current level
Do 5 sets of 10-second holds. You’ll be fatigued, so adjust accordingly. - Optional: Assisted work or drop sets
If you’re still fresh, finish with some light band-assisted holds or partner drills. If not? Call it.
This approach gives you flexibility without losing structure. You’re still getting solid volume, but you’re also giving yourself permission to try the next level and not feel like you have to hit some arbitrary “magic number.”
Too many people stall because they’re chasing longer holds in the same progression for weeks (or months). I don’t know about you but that’d drive me crazy. Worse, it’s not even that effective.
Sometimes, the harder progression turns out to be more accessible than you expected, but you won’t know unless you test it. And if it’s not quite there yet, no problem. You’ve already built the fallback volume into your session.
Keep stacking reps at your level and the go ahead and test the next one. Progress happens faster (and feels better) when you train with an adaptable structure and curiosity.
Planche FAQs: What You’re Probably Wondering
Planche training is pretty tough and it comes with a lot of questions. Here are the most common ones we hear, along with what you actually need to know.
What do I need to have down before I even start this?
First, your wrists need to be solid. This isn’t optional — planche training puts major stress on them, and skipping wrist prep is one of the biggest reasons people get sidelined early.
Also good to have:
• A strong top position on the rings
• A stable handstand hold with locked arms
Not perfect? No problem. Just means you’ve got some pre-planche work to handle first (see Elements).
How do I know if I’m ready to start?
If you can hold a solid push-up plank for 30 seconds without collapsing into your shoulders or shaking all over, you’re probably good to start with planche leans.
How long does it take to get a planche?
It depends! On your current strength, how often you train, and how consistent you are. For some, it’s less than 6 months. For others, 2 years, and that’s just the reality of building a high-level skill.
How often should I train for it?
Start with 3 days a week. Once your joints adapt and you feel confident, add a fourth day — gradually. Just don’t rush progressions. Most setbacks come from moving up too fast, follow our template here and you’ll get where you’re going
Can women do planches?
Of course! In the video above you see Kirsty killing it. With enough time and strength, anyone can work on the planche.
These progressions look different than what I’ve seen elsewhere. Are they wrong?
Not at all. Once you’ve got a strong tuck planche, there’s more than one path to the full straddle. You don’t need an exact order or rigid number of seconds.
Do what works for your body. Test, tweak, and stay consistent — you’ll get there.
Wrap-Up: This Is Hard — And That’s Exactly Why It’s Worth It
If you’ve made it this far, you already know the planche isn’t something you just get after a few weeks of practice. It’s demanding and it takes a lot of patience. And that’s exactly what makes it meaningful!
This isn’t for everyone and that’s fine. But if you’ve got a solid base, a curious mindset, and the patience to train with intent, then yes the planche is within reach. Whether or not your feet ever float perfectly off the floor, what you build along the way matters more.
Build Skills the Smart Way
Integral Strength will help you build the kind of strength that carries over into demanding physical skills and dynamic sports. All you need is a pull-up bar and a bit of floor.


Hi, I'm Ryan Hurst 👋
After a training accident ended his competitive gymnastics career, Ryan moved to Japan, where he spent close to 30 years training and competing in judo, kendo, and other martial arts until another injury made him rethink what training is for.
As Head Coach, he leads program design and teaches every week on our YouTube channel. His book, Stay On The Mat Forever, is aimed at helping you keep training for decades. He loves handstands, dogs, and hiking.