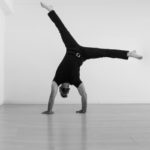
The L-Sit is one of the best strength exercises you can do, and you don’t need a single piece of equipment for it.
Try it right now. Sit on the floor with your legs out in front of you, hands flat beside your hips, and lift your whole body up, legs included. Hold.
 If you couldn’t budge an inch or lasted half a second, you’re in good company. From office workers to seasoned athletes, almost nobody nails this on the first try. It works your core, upper body, and legs all at once, and it’s about as high bang-for-your-buck as bodyweight training gets.
L-Sit Tutorial: Your Roadmap to Full Body Strength
Most people try to jump straight into an L-Sit by kicking their legs out and hoping for the best. That usually lasts a second at best, if they even get off the ground. The L-Sit looks tough and is even harder than you’d think! But with the right approach, it’s absolutely within reach.
Here’s the progression I’ve used for years with my clients. It breaks things down into manageable pieces so you can build strength and control without flailing around.
Quick note: I’m using parallettes in the video to demo the progressions, but you don’t need them to train the L-Sit. Rings or the floor work just as well, and I’ll explain how to use each option later in the article.
Here are the progressions covered in this video:
1. Both Feet on the Ground
- With your feet still on the floor, push your hands down hard and drive your shoulders away from your ears.
- Make sure to keep your butt directly beneath your shoulders.
Start by building your best foundation. Do this well from the start, and you’ll be much more solid in your shoulder positioning and core bracing. Set yourself up for further success down the road!
2. Bringing One Foot off the Ground
- From the same setup, lift one foot off the ground at a time.
- Keep your knee angle steady and point your toes.
- Keep your chest up and don’t lean forward.
With this progression, you’re starting to shift more weight through your arms. Work hard on maintaining proper positioning with fewer points of support.
3. Tuck Position
- Now you’ll be floating both feet up into a tuck.
- Work on bringing both feet up at once. If you have trouble with this, try coming on to your toes and bring one leg up at a time, until you can get into a full tuck position.
This progression is where you’ll feel how demanding this skill really is, it’s total-body tension.
4. Slight Leg Extension
- From the tuck position, extend one leg at a time.
- The key here is to slowly straighten your knee. This helps you lengthen that lever without losing your solid positioning.
Being patient and steady with this progression will help you gain the strength you need for the full L-Sit.
5. Single Leg Extension
- Now, you’re on to extending one leg fully while the other is tucked.
- Try to hold each side for at least 5 seconds.
This is the final progression before you reach the full L-Sit, and it’s an important step in the process. You’ll see how fully extending even one leg can throw off your balance. This stage builds control and balance under shifting loads. Don’t rush it!
6. Full L-Sit
- You made it! You’re now ready to work on the full L-Sit, extending both legs at a time while keeping the rest of your body locked in.
- Even with the best prep, this will feel tough. Stay patient and focus on quality holds over time.
Feeling Stuck?
Once you’ve built the foundation in the first 5 steps, you can layer in tactics in the Full L-Sit to get past some sticking points.
- Angle-Specific Holds
- If full extension isn’t happening yet, stop at a few degrees before the toughest point. Training at this angle helps you build more time under tension.
- Rest-Pause Holds
- Another way to approach this is to go to that toughest angle and instead of trying to hold for as long as you can. Try 3 to 5 shorter holds with a few breaths of rest in between.
Build the Compression Strength to Hold It
If your L-Sit stalls out, the problem usually isn’t your abs. It’s compression strength: the hip flexors firing hard enough to pull your legs up and keep them there. A lot of people find their hip flexors cramp the second they try, which kills the position before it starts.
In this video I work with my buddy Alex, who got stuck for exactly that reason. The drills here come from our Integral Strength program, and they’re built to improve the compression strength, range of motion, and control you need for the L-Sit.
The two I’d start with:
- Seated leg raises, supersetted with a shoulder bridge. Extend one leg, hug the other tight to keep yourself from leaning back, point your toes, and pull the straight leg up with control. Tighter is lighter here. Work up to 30 to 45 seconds a side for 3 to 5 sets, and drop into a shoulder bridge between sets to keep the hip flexors from cramping.
- Hanging knee raises with shoulder depression. Hang with straight arms, squeeze your knees together, and pull them up without swinging. Then add the piece that changes everything: pull your shoulders down like you’re pressing into the floor on an L-Sit. Same downward intent, just hanging. That reframe is the whole point.
Give these a couple of weeks before you judge your progress. Build the compression and the L-Sit gets a lot more honest.
L-Sit Muscles Worked: More Than You Think

The L-Sit is a static hold (an isometric position) that demands strength and control across your entire body. Your core, hips, shoulders, and arms have to work together just to stay up. There’s very little margin for sloppiness and no real way to cheat. You’re either solid, or you’re not going anywhere.
This is where isometric training really excels. It builds the kind of deep, structural strength that’s hard to get from anything else. Joint resilience, tendon integrity, and that integrated stability that supports you in awkward positions like reaching and extending while keeping your body steady.
These are the physical qualities we know we need and you’d usually have to find a whole gymful of machines to achieve all those things. And you’re not even moving!
The L-Sit is definitely a “core” move, that much is obvious, but as soon as you try it, you’ll feel how much more it works. Holding yourself in position fires up nearly every major muscle group from your fingertips to your quadriceps.
The front-line workers are the abdominals, hip flexors, and your lats. Yes, your lats! The latissimus dorsi pull your arms down and back during a pull-up, and that same action is required here to push your hands down and depress your shoulders. Without that, you’re not getting off the ground.
It’s easier to see how your abs are involved. Your rectus abdominis and obliques have to stay locked in to keep your trunk from collapsing. Your hip flexors (mainly the psoas and rectus femoris) keep your legs lifted and solid.
From there, it spreads outward. Your quads and inner thighs contract hard to keep your legs extended. Your shoulders and triceps assist your lats with the downward force through your arms, pressing you away from the floor. Your scapular stabilizers (lower traps, rhomboids, serratus anterior) hold everything in that steady “L” shape. Even your wrists and forearms contribute in this static tension just from keeping you grounded on the floor.
This is what makes the L-Sit so valuable. You’re coordinating tension across your entire system. And because it’s all isometric, that constant tension is at specific joint angles. This is a big part of joint and tendon health. Strength at end range builds tendon resilience and reinforces connective tissue integrity, right where you’re usually weakest.
One simple (but not easy) position builds high-effort stability that carries over directly into sports and real-life movement.
L-Sit Benefits: Core, Posture, Athleticism & Beyond
 When you’re pushing yourself to hold an L-Sit solidly for a decent amount of time, you’ll quickly see that you don’t always need movement to make an exercise effective. Holding the L-Sit challenges your body in ways that go far beyond just building stronger abs.
First, yes definitely, the core benefits are real. Holding this position trains your entire trunk to stay braced without movement. That kind of static stabilization does more for your spine than a dozen crunch variations. It builds the reflexive control your body relies on to protect your back, especially during unexpected jolts while walking and carrying loads.
The shoulders and upper body gain here, too. Supporting your weight through locked arms demands strength and control from your shoulders down to your wrists. It reinforces the kind of stability you need when pushing or bracing against objects, and shows up in other training, like handstands, planks, and overhead carries.
The L-Sit also hits your hip flexors hard. And here’s a bonus you may not be aware of, holding that tension under load can improve your active hip mobility over time. Weak hip flexors often go hand in hand with tight hips. Done well, the L-Sit helps build stronger, more responsive hips for athletics, for moving well, and for getting up off the floor or out of a low chair. That may seem like mundane stuff, but you don’t miss them until they’re gone!
And because the L-Sit deeply trains spinal and pelvic control, it’s a solid antidote to all the time most of us spend sitting. It strengthens what chair time weakens, especially our deep core muscles.
Then there’s the health angle. Isometric work like this has been shown to build connective tissue strength, decrease pain, and even support healthy blood pressure levels when practiced regularly. It’s a low-risk, high-reward way to reinforce the structural integrity that keeps you moving well.
Integrating L-Sits and Isometrics Into Your Routine
You don’t need to completely overhaul your training to make real progress on your L-Sit. A few well-placed sessions each week is enough if you’re consistent and intentional.
Fundamental Guidelines
- Duration: Aim for 5–30 seconds per hold, depending on the variation.
- Sets: 3–5 total work sets is usually plenty. Add more only when you can maintain good form.
- Frequency: 2–4 sessions per week gives your body time to adapt without burning out.
- Breathing: Don’t hold your breath! Use slow, controlled exhales to keep your blood pressure stable and your mind focused.
Sample Weekly Structure
- 2 to 3 days per week: Include focused L-Sit practice as part of your warm-up. Start with the first progression (Both Feet On Ground) and go up to the most difficult level you can do, for 3-5 sets of 5 seconds. This primes your nervous system and reinforces core control early.
- 1 mid-week hold day: Pick a day to focus just on isometric work. Combine your L-Sit practice with other static holds like wall sits, planks, or support holds. Keep things short and high-tension.
- On full-body or mobility days: Pair your L-Sits with dynamic lifts or mobility flows. This contrast builds strength, control, and flexibility in the same session.
This efficient training, paired smartly with what you’re already doing, can take you a long way.
Troubleshooting: The 2 Reasons People “Can’t” Do an L-Sit
We hear two common complaints from folks who struggle with the L-Sit:
- “I’m not flexible enough.”
- “My arms are too short.”
Let’s address both, because neither is a real reason to skip this skill.
Hamstring Flexibility for L-Sits
Tight hamstrings, shoulders, or a stiff back can definitely make the L-Sit feel harder, but they don’t make it impossible. In most cases, this just means a bit more prep work to loosen things up alongside your holds.
- Tight hamstrings can make it tougher to keep your legs straight, but you’re not trying to win a straight leg contest! You can still work the heck out of your tucks and as straight as your legs can go. Meanwhile, chip away at your hamstring flexibility a few minutes at a time and you’ll eventually get there. Click here to see how to work on your tight hamstrings.
- Tight shoulders make it tough to press down and use your muscles to the fullest. That’s where our daily shoulder mobility routine comes in handy.
- A stiff back can hinder your alignment but don’t let that stop you either. Spend some time on our spinal mobility routine and posture holds alongside the L-Sit variations. A straighter back will come with practice.
Of course it’d be ideal to be more flexible when you train the L-Sit. But waiting until you “get flexible” just delays your progress. You’d lose out on all the benefits you’d have gained if you started on the L-Sit right now, along with a bit of supplementary flexibility work you probably need anyway. Don’t wait, do what you can now. As the months pass, you’ll be glad you did.
Arms Not Reaching the Floor
This one’s surprisingly common.
And while it might feel like a real limitation, especially when you’re pressing on the floor and can’t get lift-off, it’s almost always a strength issue. Your lats and scapular muscles just aren’t used to doing this yet and they need time to adapt.
Using parallettes, pushup bars, blocks, or even a couple of books can help.
They give you a higher starting position and more room to press downward, which makes it easier to feel what proper shoulder depression should feel like.
But, you don’t need gear. The floor works just fine. Focus more on pressing down hard and locking in that shoulder position. You’ll get stronger and that’s the point of this training.
If you could already do the L-Sit on your first try then you wouldn’t be reading this!
Practicing L-Sits on the Rings, Floor, or Parallettes
This brings us to the use of equipment. You can practice L-Sits on the floor, parallettes, or rings, and each surface brings its own challenge.
Here’s a video comparing the feel of each version:
Bottom line: They all work, pick what you have and what you like.
That said, many people do like starting their practice using parallettes for two reasons:
- They can take some of the pressure off your wrists.
- And what we mentioned above, the “arms are too short” issue. The parallettes make it easier to get the feel for the pressing motion necessary for this skill.
If you’ve got parallettes, great. If not, don’t sweat it. Use the floor, press hard, and keep your form tight. You’ll build what you need. Just focus on pressing those shoulders down!
One more thing if you plan to train on your fingertips or fists on the floor: build the wrist strength first. Check out our wrist prep video on YouTube before you load up that position.
Common L-Sit Mistakes – And How To Fix Them
No matter where you are in your L-Sit practice, a few technical details make all the difference. Getting these right not only makes the position look better, it makes it work better. Your body becomes more efficient, stable, and strong when everything’s aligned and integrated well.

Here are the most common issues I see, and how to clean them up.
1. Dropped Shoulders
When your shoulders creep up toward your ears, you’re losing out on building that shoulder and back strength.
Fix: Actively push your hands down into the floor and drive your shoulders away from your ears. Think about lengthening your neck without shrugging.
2. Rounded Back
This often shows up as a collapsed chest or tucked-under pelvis.
Fix: Lift your chest and engage your core like you’re bracing before a heavy lift. You want to be compact, but not hunched.
3. Bent Knees or Sagging Legs
Losing tension in the legs makes the hold harder, not easier.
Fix: Lock out your knees and squeeze your quads. Point your toes and keep that tension running all the way down to your feet.
4. Death-Gripping the Floor or Parallettes
Over-gripping wastes energy and stiffens your movement.
Fix: Keep a firm, active grip, but don’t strangle it. Focus on pressing down rather than clenching.
Each of these adjustments adds up. As you go through your progressions, stay mindful of how everything feels. Don’t just grit your teeth and hold your breath until your eyes start bulging!
For even more about the reasoning behind each of these points, check out this podcast.
L-Sit Questions and Answers: We Got You!
What is an L-Sit good for?
What muscles does the L-Sit work?
How do you do an L-Sit?
What are common mistakes?
How do you progress to an L-Sit?
How often should I practice?
How long does it take to hold an L-Sit?
What if I can’t lift both legs?
Can L-Sits help with posture or back pain?
Are L-Sits safe for beginners?
Why bother to do these?
Advanced Variations To Keep Progressing
Once you’ve got a solid L-Sit, you don’t need to stop there. You can keep progressing by adjusting the shape, increasing the tension, or layering in new challenges that push your control and strength further.
- Straddle and V-Sit Variations
- Taking your legs wider into a straddle shifts the load and challenges your hips in new ways. Bringing them higher into a full V-sits, while keeping your spine tall and your arms locked in, demands even more active flexibility and compression strength.
- Isometric-Dynamic Chains
- Combine holds with movement for a hybrid effect. Try a tucked L-Sit hold, then extend one leg and return, or move in and out of the V-sit shape with slow control. These are great ways to challenge your body to move without losing position.
- Partner Holds for Added Resistance
- If you’ve really dialed in your form, you can even try partner resistance. Have a training partner gently push down on your legs or shoulders to increase the challenge. Just make sure your form is super clean before you add load.
Isometric Strength Essentials for Everyday Life
The kind of strength you build with the L-Sit goes beyond being strong in the gym. Holding steady under load is one of the most useful physical skills you can train.
The list is pretty long! Keeping your posture from collapsing after hours at a desk, bracing while carrying heavy groceries or a squirming kid, staying balanced on uneven terrain, and protecting your joints during awkward movements are just a few of the areas you’ll feel improvements.
Isometric strength makes your body more responsive and more resistant to injury. And because you’re working hard without moving through full ranges, isometrics are joint-friendly and low-impact. That makes them ideal for people dealing with stiffness, past injuries, or just the wear and tear of training hard for years. Isometric holds have even been shown to help manage blood pressure levels safely and effectively.
That’s the thinking behind Static But Deadly, a training approach built around compact, progressive, and brutally effective static work.
Static But Deadly: A Full Body Isometric Program
Static But Deadly is a minimalist isometric training program designed to build serious strength and control through holding positions.
You’ll train static holds like the L-Sit and compression drills using just your body and gravity.
Whether you’re recovering, rebuilding, or just want a smarter way to train, Static But Deadly will get you where you’re going (ironically, without even moving!)
“I did 2 sessions this week and holy cow… it was the hardest of any GMB program I’ve done. Holding those positions was HARD, but I can see how it’s hugely beneficial.” —GMB Client
Stillness Isn’t Easy (But It Works)
Ready to get strong by standing still? If you’re looking for a straightforward way to build strength, control, and resilience with minimal gear and zero fluff, Static But Deadly is exactly that.


Hi, I'm Ryan Hurst 👋
After a training accident ended his competitive gymnastics career, Ryan moved to Japan and competed in various martial arts until another injury made him reevaluate his priorities in life.
As Head Coach at GMB Fitness, his mission is to show everyone that you can define your own fitness as a sustainable and enjoyable part of your life. He loves handstands, dogs, and hiking.