
The most effective thing I’ve found for my posture and shoulder tension was a $25 Amazon impulse buy at the start of the pandemic.
I spend a lot of time at a computer. I have the good chair and the standing desk, and I’ve thrown thousands of dollars at ergonomic office gear and mobility gadgets over the years. The pull-up bar beat all of it, and six years later it’s still my first stop every morning and a few more times a day between work tasks.
It’s true: regularly spending a few seconds hanging from a bar can make you taller and more attractive reduce shoulder pain and stiffness while relaxing your spine and giving you a stronger grip.
Of all the infinite variety of exercises and mobility gadgets and secret protocols out there, the most effective solutions are often the ones hiding in plain sight.
Dead hangs are one of these.
Simple. Easy. They work.
Everyone and their brother is making crazy health claims on the internet, though, so let’s start by defining what hanging works for…
What we’ll cover in this article:
Dead Hang Benefits | Anatomical Concepts | Hanging Exercises Video | Exercise Breakdown | How Long to Hang | Risks of Hanging | Training Safely | Full-Body Strength
Real-World Benefits of Dead Hangs
Right out of the gate, I want to make one thing perfectly clear: hanging feels good.
But if the promise of frequent stretchgasms isn’t enough reason for you to buy a pull-up bar and start doing this daily, you’ll be pleased to know there are also some very rational excuses you can offer when people in your family ask why you spend so much time just hanging out.
If you believe everything you read in the Instagram comments, hanging is responsible for curing asthma, cancer, and radiation burns. Please take fantastical claims with a grain of salt. Especially from anonymous internet commenters.
Hanging is great or we wouldn’t be telling you about it, but the benefits are more practical:
Stronger, More Mobile Shoulders
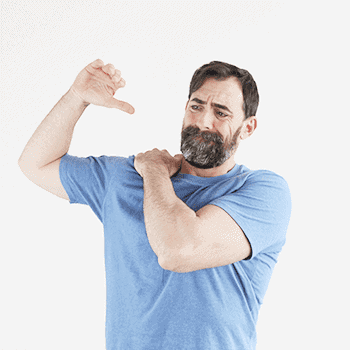
Ryan does a lot of hanging to counter the wear from years of Judo competition.
We cover more of the shoulder anatomy here, but the most important thing to understand is that passive hanging applies an unusual force to the muscles and ligaments of the shoulder in an unusual direction… and this can be a very good thing!
Hanging also builds strength in the shoulders, back, and core. By supporting and pulling your weight, you engage these muscles in ways that common daily activities never ask for.
Stronger, Longer-Lasting Grip
In addition to being useful for opening pickle jars, grip strength has a high correlation with longevity and quality of life in later years.
I mean, who wants to live to 100 if you can’t open your own pickles?
Supporting your full bodyweight with your hand strength alone may be difficult at first, but we’ll show you several exercises you can use to gradually build the strength and endurance of your grip.
Most people never train grip on purpose, so the payoff shows up fast and keeps accumulating.
Healthy, Relaxed Spinal Column and Better Posture
Hanging provides traction and unloading all through the body, but especially at the upper and mid thoracic spine.
Think of a line across the back of your shoulders right to your spine. That area receives the traction force from hanging by your hands, with the weight of the rest of your body pulling you down, and this can help balance the daily compressive forces we experience.
More about how this works in the next section.
Basic Anatomy of Hanging: Spinal Compression and Traction
The main thing to know here is that bones, ligaments, and tendons require both traction and compression for stimulation and adaptation. These forces encourage proper nutrition and function. Too little and too much of either aren’t good.
Compression doesn’t have to be something pushing down on you or a weight on your back. Compression also happens when you sit and the weight of your upper body bears down on the joints you’re sitting on.

Despite having co-authored a book on improving posture, Dr. Jarlo Ilano often slouches when he sits, which puts his spine into compression.
If you spend a lot of time working at a computer, your back is probably rounded and your shoulders and head are forward when you type. That puts your spine under compression, particularly at the junction between your neck and upper back and in your lower back.
Hanging counters all that daily compression by spending some time with those same joints in traction.
Traction is the opposite of compressive force: any way you can “open up” the spaces between areas. Grab a sturdy fixed object and lean back and you’re providing traction in all the spaces between your hand and your center of gravity. Grabbing a bar to hang creates spinal traction that runs directly against the force of gravity.
And yes, it can be just that easy, but we’ll show you a few different ways to make it interesting 🙂
Easy, Fun Hanging Exercises to Try
I’ll add some notes about each of those hanging exercise variations below, but first a couple of general points to cover…
Grip: How to Hold On When Hanging
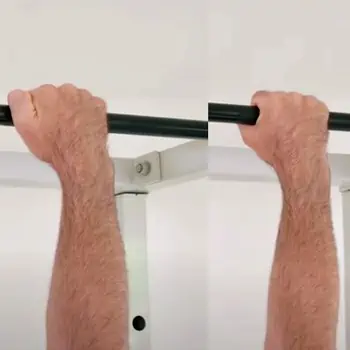 When hanging from a bar, you have two options. Choose whichever feels best:
- Standard grip with thumb wrapped around the bar
- Monkey or overhand grip with thumb over the bar
When hanging from gymnastic rings, don’t get cute:
- Wrap the thumb around the ring
- That’s it ☝️ No other options 😉
There are three different ways to grip gymnastic rings, but for our purposes here, the normal wrapped grip makes the most sense. If you’re setting up rings for the first time, here’s how and where to hang them.
Active vs Passive Hanging
In the video, you’ll see Ryan both passively and actively hanging on the rings.
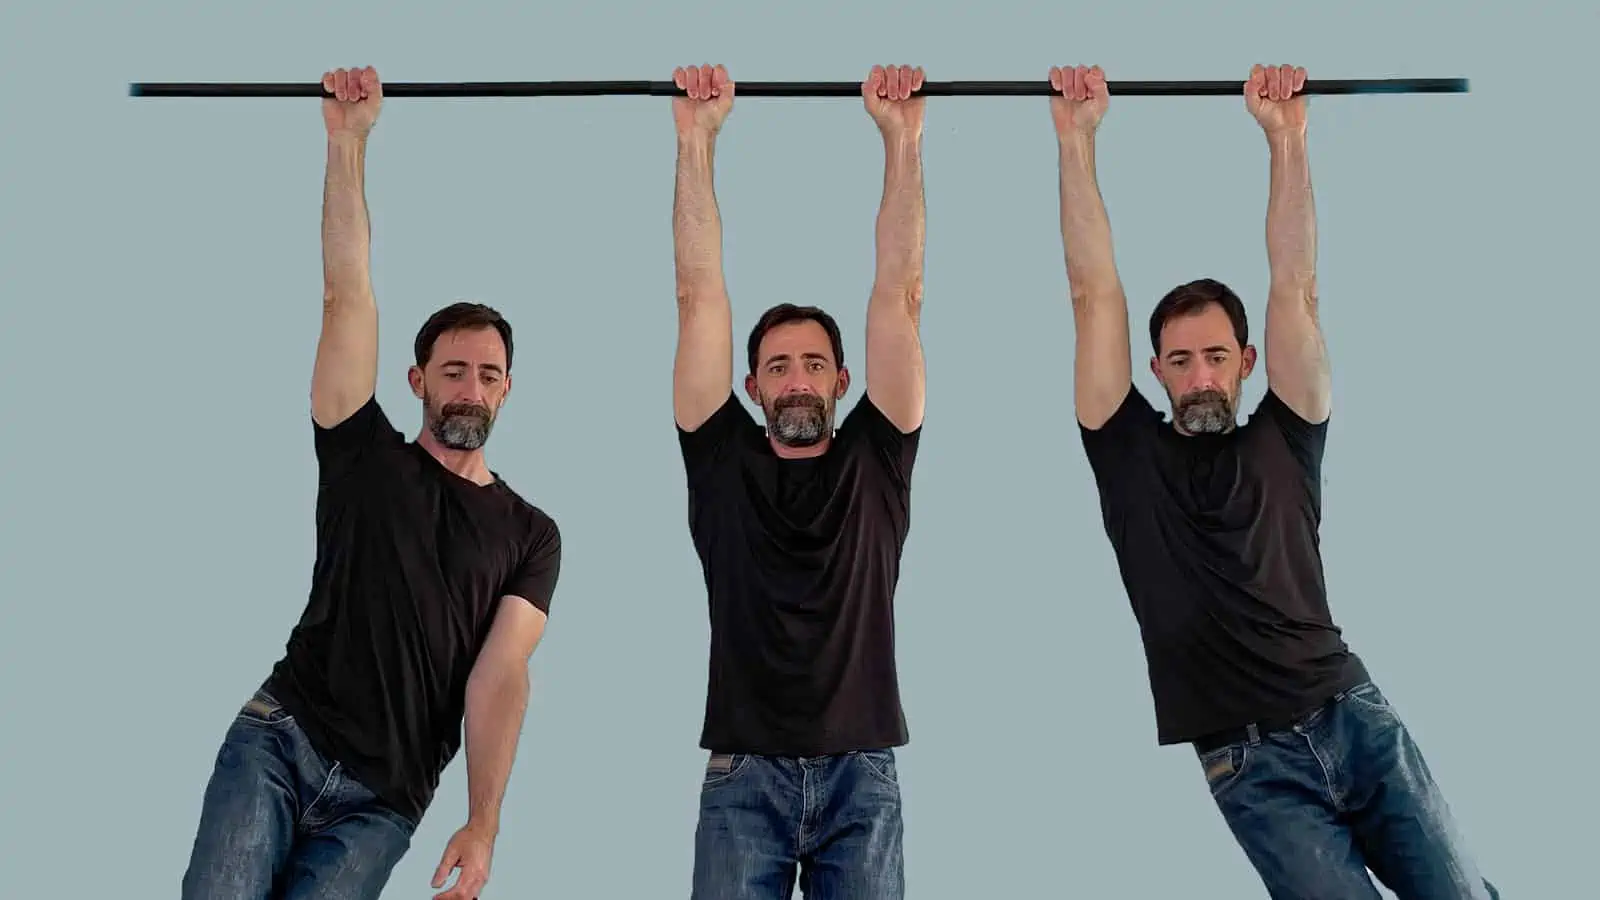
- In a passive hang, you let gravity do its work, fully relaxing the shoulder, back, and core muscles.
- In an active hang, you hold some tension in your arms and engage your back muscles to pull your shoulder blades down and maybe slightly back.
Both are valuable. Passive hangs with the shoulders elevated and extended are great for relaxation and opening your shoulders and spinal joints (traction). Active hangs teach you to use your shoulder musculature to control the scapular movements in different directions (retraction, protraction, and depression).
You don’t need to go crazy trying to turn this into a technical skill. It’s enough to practice moving in and out of tension here, engaging and relaxing the back and shoulders.

Put aside for a second how creepy it would be to see two of Ryan hanging from a bar in real life. On the left, a relaxed passive hang. On the right, lats engaged for an active hang.
Hanging Exercise Explanations and Tips
The possibilities for incorporating hanging and brachiation (swinging/traversing) exercises into your workout or daily routine are just about limitless. Once you build up enough grip strength to hold onto the bar a while, you can do all sorts of fun things 🙂
Here’s a list of the exercises in the video with some additional details to keep in mind for each:
Passive Hang with Assistance
Keep feet on the floor or a bench, ladder, etc. If you’re tall, bend your knees and keep your toes on the floor.
This lets you support a portion of your weight with your legs while your shoulders get used to supporting you in this position. Read the section on risks below for more explanation, but you don’t want to jump (literally or figuratively) into this. Ease in, and your body will adapt over time.
Start with assisted hangs, working up to 20 to 30 second holds.
Active Hang with Assistance
Still using your legs a bit, but now engaging some of the shoulder and back muscles. Focus on keeping your arms straight. It helps to think about pulling the chest up rather than pulling down with the arms.
Passive Hang with Feet Off the Floor
After you’ve gotten used to hanging a bit and have enough grip strength, you can practice without any assistance.
Just as with the assisted hangs, add time gradually.
Active Hang with Feet Off the Floor
We often recommend this “pulling prep” for learning to activate your lats and upper back in pull-ups.
Swinging Side to Side
This is where you start to learn about selective tension, since the grip tension changes as you swing, giving a little break to one hand as you move. Because you relax your grip going side to side, you can often stay up there longer.
Swinging Forward and Backward
Thumb around the bar is probably the best grip when you first practice this, since it gives you a firmer hold.
Note: make sure you’re using a solid structure that won’t tip or fall. If you’re on a door-frame bar, skip this one.
Single Arm Hang with Assistance
Same as above with the assistance. Once hanging with both arms feels comfortable and somewhat easy, you can work on single-arm hangs.
It’s easy to underestimate what a difference this makes in terms of strain on your joints and connective tissue, so we recommend using assistance at first, even if you feel like you’re “strong enough.” Be gradual in adding load to your joints.
Single Arm Hang, Feet Off the Ground
Once you bring your feet off the ground you’ll probably find that you turn or twist, and that’s normal. One side is going to be weaker than the other, which is also normal.
Remember: imbalances won’t kill you.
Relaxed Grip Option for Single Arm Hang Practice
Start with both hands on the bar, then relax the grip of one hand. Work on releasing the fingers one at a time, from four down to three, two, and finally one, so the other hand takes more of the load. Then switch sides.
Single Arm Swings Side to Side
Swing side to side as you did with both hands on the bar. In this variation, you take one arm off the bar, swing, then grasp with the other hand and continue the swing.
You can also do this with toes on the floor first to get a feel for the movement.
Traversing
If you’re working on a bar, you’ll swing side to side, switching hands as you work laterally across the bar.
You can also do this with toes on the floor first to get a feel for the movement.
What to Hang From
There are still ostensible adults who post questions like this one on the internet:
but, but, what if i don’t have anything to hang from?
I’m gonna save us both some time and point you to the exact pull-up bar I bought for under $25.
You’re welcome.
If you click that link and come back to me with some BS about how your home doesn’t have doors or something, we are no longer friends.
I could fill up this space with a bunch of ideas about finding a tree branch or something, but honestly, if you’re not ready to take responsibility for buying yourself a pull-up bar, you’re probably not gonna follow any of this advice anyway.
Don’t be a weeny.
We are grown-ass adults. You can make it work.
How Long to Dead Hang, and How Often
Short answer: start with 5 to 20 seconds per hang, add about 5 seconds at a time, and work up to 30 to 60 seconds. One set is fine. At least three days a week, and every day if you can manage it.
There’s no magic number of minutes of daily hang time. Do what feels right and be consistent with it. This is one of very few exercises we recommend doing every day.
Sets and reps depend on what other moves you’re doing, how much you weigh, how strong you are, and whether you have any prior injuries.
So count seconds. Start with 5 to 20 seconds for each hang variation and gradually add 5 seconds. Work up to being able to hang for 30 to 60 seconds. When you can do 30 seconds, you might try a more challenging variation.
Important: these are not “progressions” in the sense that your goal is to graduate to higher-level hangs. Pick whichever variation feels somewhat challenging while you can still hold good form, and stay there as long as it keeps feeling like practice.
For sets, one is fine. You can work up to as many as you feel like or have time for.
Ryan puts it this way in the video: hangs don’t take much time, your progress won’t always be obvious, and this is something you can keep as part of your routine basically forever. Consider it a long-term practice. That’s the whole appeal. You feel the difference in your shoulders the first day, and the grip and shoulder changes keep accumulating for years after.
Here’s how Ryan uses hanging in his regular routine:
Nowadays I only do a single set each morning as the first thing in my morning mobility routine. It’s a great way to start off the day and depending on how I feel I’ll change up what hang I do that day. I don’t count how long I’m hanging anymore and I just hang until I feel like I’m done. So it could be anywhere between 10 to 60 seconds each day. I know that sounds super random, but the important thing for me is just doing it every single day.
He also drinks his morning coffee while hanging, which… isn’t normal.
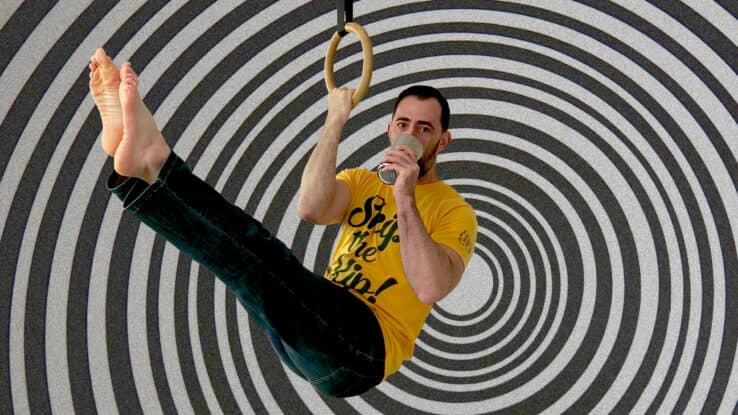
Not really
Personally, I have a bar in my office, and I hang from it for an unspecified number of seconds, here and there, randomly throughout the day. It’s a nice break from work and feels good when I’ve been sitting like Jarlo for too long.
If you also spend too much time staring into the black abyss of a desktop computer screen, try this routine you can do at your desk.
Some Caveats and Risks of Hanging
The biggest “risk” of making hanging a regular part of your routine is that it’s easy to fall into the “more is better” trap. Especially since hanging feels so gooooooood.
But a little goes a long way here, and too much can overstretch your ligaments and muscles, which can trigger a protective reaction from the body. Muscle spasms and pain from too long and too intense a hang are the usual side effects. You may have seen inversion tables and contraptions where you hang from your ankles. A lot of people learned the hard way that a longer hang isn’t a better one when they found themselves on the floor, unable to get up again.
The same caveats about overstretching muscles, tendons, and ligaments you aren’t used to loading apply here as in any other exercise.
You’ll see a fair amount of advice to do these for shoulder health, but if you’re already dealing with shoulder impingement or have difficulty reaching overhead, be wary of overdoing this and aggravating your condition.
Safe Training of Passive Hanging
Hanging is generally safe, as long as you aren’t hanging off the side of a bridge or something. And of course, make sure you have a sturdy support before jumping up and trusting it with your full bodyweight.
Here are some less obvious tips to make your training enjoyable and effective:
- Start with your weight supported rather than jumping to a full bodyweight hang. See the “assisted” versions of each exercise above.
- Even as you get acclimated, set yourself up so you can easily use a support to end the exercise rather than just dropping down.
- Try different angles rather than simply “straight down.” This goes hand in hand with starting with your weight supported. Adjust your angles to find your current sweet spot for hangs.
Take it slow and steady. You won’t win a medal for this.
Take your time and keep going.
Dead Hangs Are One Part of Your Full-Body Strength Development
If you just wanna loosen up your shoulders and counter some of the wear from desk work, it can be just that simple:
- Grab something sturdy.
- Hang for a few seconds.
- Repeat.
If you’re already doing regular workouts to build your overall strength and mobility, add some passive hangs and see the difference for yourself after a few days.
And if you don’t have a structured plan for protecting your joints and keeping your body strong and pain-free, check out Integral Strength. Hanging is built into the program, alongside the pushing, pulling, squatting, and core work that make it useful.
Simple Bodyweight Exercise for Full-Body Strength
Integral Strength is a systematic strength program you can do at home to build practical skills and strength that carry over into your most important daily activities.

Hi, I'm Andy Fossett 👋
A lifelong martial artist and former schoolteacher, Andy's deeply concerned with autonomy and fitness education. As CEO, he's dedicated to providing an open, accessible culture for both clients and staff to enjoy exploring more of what they're truly capable of.
These days he mostly coaches teachers, from GMB Trainers to martial arts instructors around the world. The rest of his time goes to burgers, bourbon, and his wildly off-topic rants on the GMB Podcast.