Most of the day happens in front of you. Tying shoes, reaching for coffee, typing, driving. Hours of it, with the arms out front and the hips bent.
None of those positions are bad. The problem is how rarely you leave them. Spend enough time going one direction and the other directions get stiff and unfamiliar: tight shoulders, a stiff upper back, hips that resist opening.
The Three Point Bridge goes the other way. You push your hips up, open the front of your body, reach back, and rotate, all while holding your weight on one hand. We’ve taught it for years because it covers a lot of ground in one movement.
How to Do the Three Point Bridge
The position looks odd the first few times you try it. That’s expected. It combines extension, rotation, and weight on your hands, and you probably don’t put those together very often.
1. Sit in a Squat That Works for You
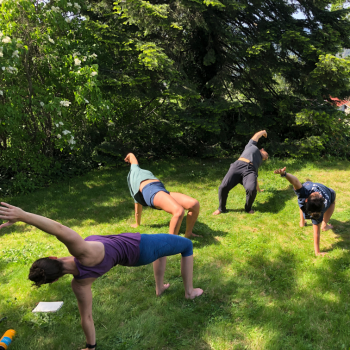 Start sitting low with your feet flat. You don’t need a deep squat, just a stance you can hold comfortably.
Place one hand on the floor behind you, about a hand’s length from your hips, with your fingers pointing away from you. If the shoulder feels pinched there, move the hand slightly out to the side.
Play with foot width, hand angle, and knee bend. The setup that works today may change next week as the position gets familiar, so don’t lock in one version.
2. Drive Your Hips Up
Give the movement one primary intention. Here it’s hip height. Push through your heels and lift your hips as high as they’ll go.
A few inches off the floor is fine to start. Get the hips moving first and the rest of the movement builds from there.
3. Roll the Shoulder Out, Reach, and Look Back
Press your supporting hand firmly into the floor and roll that shoulder outward, so the elbow pit faces forward. That engages the rotator cuff and gives you a stable base to work from.
Once that feels steady, reach your free arm up and back and turn your head to follow it. Rotate toward the supporting hand and shift more weight onto it as you get comfortable.
Hold for 5 to 10 seconds, come down, and switch sides. Alternate for a few rounds.
Why It Helps a Body That Sits All Day
 Daily life trains flexion: bending forward at the hips, rounding the upper back, reaching in front of you. The Three Point Bridge puts you in the opposite positions at once. It extends the spine, takes the shoulder into extension and external rotation, and opens the front of the hips, while your legs and core hold you up.
That last part is the difference between this and a stretch. A lot of “posture” stretches put you in an open position and let you hang there. In the bridge you’re supporting your weight through a wide range, so your shoulders and hips get stronger in those positions as they get more mobile.
The supporting shoulder gets the most out of it. It works in extension and external rotation under load, two ranges that get almost no use at a desk. That’s why the bridge is one of the eight moves in our daily shoulder mobility routine.
If the Full Bridge Is Too Much, Start Here
What makes the Three Point Bridge useful also makes it hard at first: it’s unfamiliar. If you can’t get your hips up yet, or your shoulder won’t settle into the position, these two regressions build the pieces separately.
Lounge Chair
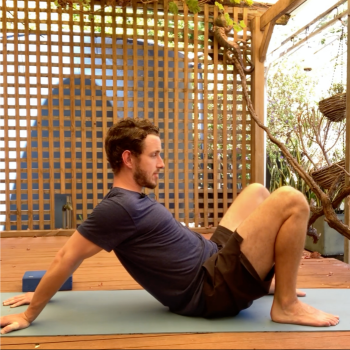 Sit with both hands on the floor behind you, fingers pointing away. Pull your chest up and draw your elbows toward each other. You should feel a stretch across your chest and the front of your shoulders, without letting the shoulders round forward.
Your hips and legs take most of your weight here, so you control how much pressure goes through your hands. Pulse in and out of the position five times, then hold for 10 to 30 seconds. To go deeper, scoot your hips a little closer to your heels before the next round.
Supine Tabletop
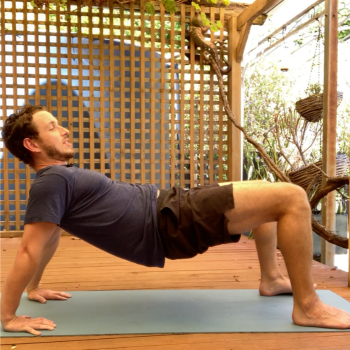 Sit with your feet a comfortable distance from your hips and both hands behind you. With both arms sharing the load, you can focus on shoulder position and hip height.
The cues match the bridge: hips up, chest open, shoulders rolled out. Do five reps up and down, then hold the top for about 15 seconds. Build the hold time as it gets easier.
Start With the Real Movement
Use the regressions as a primer, but you don’t need weeks of them before you try the bridge. Try the full version in your first session and size it to fit: lower hips, hand farther out, less rotation.
There are two ways to get this wrong. One is waiting until the regressions feel perfect before moving on, which can take months and buys you nothing. The other is forcing yourself into the full shape from the video and grinding through it. The useful middle is to practice the real movement at whatever size you can control and let it grow.
That’s the same principle behind autoregulation. What you can do changes from day to day, so you adjust the exercise to match the day you’re having.
Put It in Motion
Once the static bridge feels familiar, start moving. From the bridge position, walk your hands and feet forward, back, and side to side. That’s Crab, one of our four core locomotion patterns.
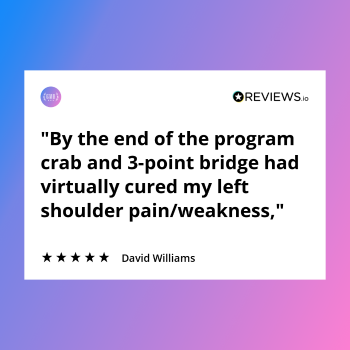 Moving through the position gives you far more variety than holding it. Your shoulders and hips take load from changing angles, and you have to coordinate your whole body to stay up.
It’s the same idea we teach with the resting squat. Holding a position is a start. Moving in, out, and around it is where the position becomes usable.
How to Keep the Range You Build
A few sets of Three Point Bridges will leave you feeling more open the same day. Keeping that range takes regular practice in the directions your day skips.
Isolated mobility exercises work best as a short-term tool. They’re useful for a few weeks to get a stuck area moving again. What makes the change last is training that loads those ranges inside coordinated, full-body movement, week after week.
That’s how we built Elements. Crab and three other locomotion patterns form the foundation, and each session progresses based on how you’re moving that day.
Train the Directions Your Day Skips
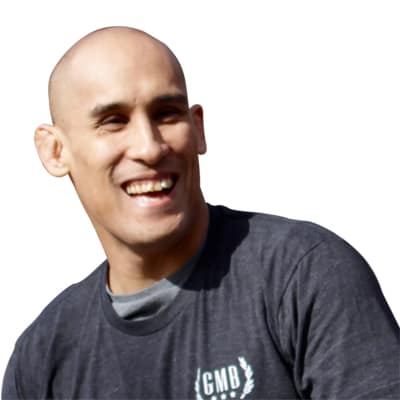
Hi, I'm Jarlo Ilano PT, DPT 👋
Jarlo Ilano, PT, DPT has been a Physical Therapist since 1998. He earned his Master of Physical Therapy from the University of Puget Sound and his Doctorate of Physical Therapy in Musculoskeletal Management from Evidence In Motion Institutes of Health Professions, was board certified as an Orthopedic Clinical Specialist with the American Board of Physical Therapy Specialties, and is a certified Therapeutic Pain Specialist through EIM/Purdue University.
In addition to cofounding GMB, Jarlo has been teaching martial arts for over 30 years, with a primary focus on Filipino Martial Arts. He designed our Train Without Pain guide and our knee and shoulder restoration programs.