Gymnastic rings are typically used for building strength and control–and they’re fantastic for that! But a lesser known application is using them for improving shoulder mobility.
Because the rings are free moving, they give you a lot of flexibility (no pun intended) with how you can move your shoulders.
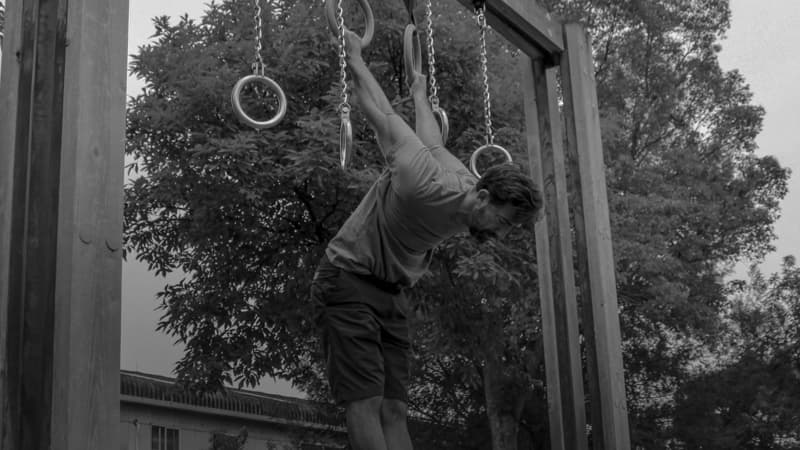
One of my favorite ways to work on shoulder mobility on the rings is with an exercise called the German Hang (when put into motion, this movement is referred to as the Skin-the-Cat). At its end-range, it can look pretty intimidating, but the progressions I’ll show you below will help you work your way to better shoulder mobility.
The German Hang in Action – Fundamental Progressions to Help You Get There
 The German Hang position is an impressive gymnastic ring exercise that showcases great shoulder flexibility and strength. It can also look alarmingly perilous and unsafe if you know your shoulders have some issues.
But just as Jarlo talked about in this previous post certain exercises are only dangerous if your approach is rigid and imprudent.
In this tutorial I’ll show you the proper way to prepare yourself for this position and how to learn to move through the exercise variants until you are ready for the full German Hang in a safe and progressive way. It takes into account the versatility of the rings themselves and how you can adjust them to your needs, and also the fundamental principles of progressive loading and appropriate exercise variation.
First a small terminology clarification:
- the German Hang is the position of full shoulder extension (arms behind your back) whilst grabbing the rings.
- the Skin the Cat exercise is the dynamic action of moving in and out of the German Hang position from the inverted hang
Below are the variations you’ll learn and move through, with the initial variants being progressively weightbearing and the later ones adding on changes in the active entry and exit from the German Hang. It will be more clear as you go through them.
A note for all of these exercises: Make sure to have the rings at an appropriate height where you can drop out of the exercise quickly and safely if needed.
Progression #1 – Shoulder Stretch on Knees (Rings at Head Height)

- Keeping the palms down, lead a circle backward with your little fingers.
- When you are as far back stretched as you can, rotate your hands so that your palms are facing forward and your thumbs are facing towards your body.
- Keep your elbows locked straight.
- Hold for a few seconds and then reverse the direction to your starting point.
Be careful with very long holds in this position. I would start with a maximum of 15 second holds in the stretch for 3-5 sets. Then as you adapt and get used to it, you can progress to 30 seconds for 2-3 sets. The shoulders are vulnerable to overstretch, especially in this position.
Progression #2 – Shoulder Stretch (High Rings)
 This progression has the rings now at about shoulder level height.
- Go directly into the German Hang position, palms facing backward with thumbs pointed outward, elbows straight.
- Bend your knees and walk backward a few steps for more of a stretch.
- Also rotate your arms until your palms are facing forward as in the stretch on knees for an even greater stretch.
Just as in the first exercise, work your way up to longer holds, starting at 15 seconds and slowly progressing to 30 seconds over the course of several sessions.
Progression #3 – Jump to Inverted Hang

- With the rings set at about shoulder height, grip tightly and jump up so you are hanging upside down.
- Lower slowly backward until your feet touch the ground, and then go into the German Hang position as before.
- Hold for just a couple of seconds and then walk forward and stand up while rotating your shoulders forward to complete a repetition.
This is a more dynamic flexibility exercise, with an emphasis on strengthening at the stretch position by actively going into the German Hang variation.
Start with lower reps and moderate sets – 5-7 sets of 3-5 repetitions. And work toward 3-4 sets of 8 repetitions.
Progression #4 – Jump to Inverted Tuck (Toes on Ground)

- This movement is just as above but instead of standing and rotating your shoulders, you will touch your toes down and then reverse your motion and pull yourself back up and over to the starting position.
- Now you’ll be working on actively moving into and out of the German Hang.
Keep to moderate sets and moderate reps, 3-5 sets of 4-7 repetitions.
Progression #5 – Straight Arm Pull to Inverted Tuck (Toes on Ground)
 You can raise the rings to about eye level height for this exercise.
- This is the same movement as you’ve seen in the previous progressions, but without a jump and an emphasis on keeping the elbows straight throughout the entire movement.
- Here once you are in the stretched position and your toes are on the ground, simply release the rings and bring your arms down to complete the repetition.
With the higher difficulty of a static start with a straight arm vs. a jump, this goes back to working actively into the stretch, and then releasing it before beginning the next repetition. Keep the same moderate sets/reps scheme of 3-5 sets of 4-7 repetitions.
Progression #6 – Straight Arm Pull to Inverted Tuck (Toes on Ground then Back to Inverted Position)

- Just as it sounds, you are doing the pull to the stretch position, but instead of letting go of the rings, you will pull yourself back over to the starting position.
We’re now back to actively moving in and out of the stretch. With the increased difficulty, lower the repetition scheme, and do 3-5 sets of 3-5 repetitions for high quality of technique. Hold the stretch longer for increased difficulty but not more than 5 seconds.
Progression #7 – Straight Arm Pull to Pike German Hang to Invert

- The rings are now at a height just above your head. Now at this higher height, do the same movement as in previous progressions, but now your feet do not touch the ground.
- In the German Hang position keep your feet up off the ground and forward of your head.
This is the next to the highest difficulty. Perform at moderate sets of low repetitions – 3-6 sets of 3 repetitions, with holds of no longer than 5 seconds.
Progression #8 – Full German Hang

- In this position, you work to keep the feet in line with the vertical, not out in front of the head. This is a more intense stretch.
- Point your toes.
As you can continue to practice and improve in the position, you can experiment with longer duration holds. But when you first begin stick with 3-6 sets of 3 repetitions, with holds of not longer than 5 seconds for a long while. Then slowly increase hold times.
Programming for the German Hang

Don’t rush into an advanced stretch like the German Hang without proper conditioning of your shoulders.
Though I wouldn’t necessarily call this a “dangerous” exercise, it is one that has potential for abuse if you lack patience.
The first two variations allow you to have a lot of control over how much bodyweight you put through your shoulders, how intense of a stretch, and how long you stay in the positions.
Always err on the side of doing too little in the beginning and ramp up your intensity and volume slowly. Give your body a chance to adapt and strengthen and you’ll be much better off than if you were too greedy and court injury at every session by overdoing it.
These first two exercises are ideal for daily stretching work before and after your regular training to improve your shoulder flexibility and capacity to handle this stretch position.
The rest of the variations are progressive towards the German Hang and build upon each other.
I’d recommend at least one rest day between workouts with these and a max of 3 days a week at first. Don’t be tempted to skip over them quickly even if you are able to do a few repetitions well. Stay at each level for at least 4 sessions and at a high quality of exercise performance and low effort before trying the next progression.
And start the newest progression at the lowest recommended set and repetition range.
Build Shoulder Strength and Mobility
 The German Hang position is a great example of the unique stimulation gymnastic ring training can provide in your exercise program.
But it can also be a lesson of going too fast into a position that can hurt rather than improve your physical condition. You can see after learning everything in this post that it’s more a matter of patient planning and progression that is the difference between a helpful and “dangerous” exercise, rather than the particular exercise or the tool you perform it upon.
Take your time through these and the benefits of ring training will be apparent in your stronger and more flexible shoulders, as well as core and overall sensation of body control.

Hi, I'm Ryan Hurst 👋
After a training accident ended his competitive gymnastics career, Ryan moved to Japan and competed in various martial arts until another injury made him reevaluate his priorities in life.
As Head Coach at GMB Fitness, his mission is to show everyone that you can define your own fitness as a sustainable and enjoyable part of your life. He loves handstands, dogs, and hiking.

