It’s no secret that handstand push-ups look cool. But most people who can do them will tell you they feel even better.
Doing a solid, smooth handstand push-up is a feeling of pure athletic flow. You feel your whole body working in a perfect concert of power, balance, and control.
But believe me: that’s a feeling you have to earn.
A full handstand push-up is a very challenging move, and the training it takes to nail one is hard. The good news is that this training is also really valuable—even above and beyond your handstand push-ups.
Most people think of handstand push-ups as a feat of upper body strength (and the benefits to your upper body will be significant).
But they don’t usually think about balance, body and spatial awareness, and control of your vertical body not just statically but through a range of motion. These are physical capacities you can take into any activity or skill.
All that to say: Yes the training is hard. But the results are worth it.
In this tutorial I’ll show you the best methods I’ve used to get a person from scratch to a solid handstand push-up. Follow these progressions carefully and put the time in, and you’ll get it eventually.
Get 16 Proven Strength Tutorials
We’ll send you our best methods and progressions for building practical strength, yours free.
Handstand Push-Up Progressions
First things first, if you don’t have a good handstand, then it will be much harder for you to do the full handstand pushup. If you haven’t already, go through our detailed and comprehensive handstand tutorial and get to work on nailing your handstand.
You can, however, start on the first progressions I teach here while you work on your handstand, because these fundamentals start with the overall strength you need and don’t require you to have a freestanding handstand yet.

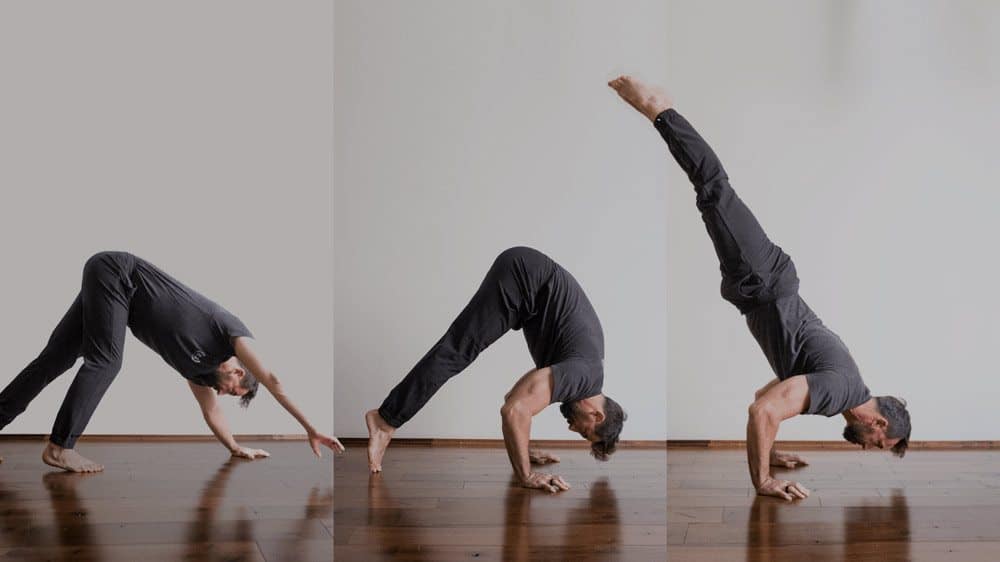
The handstand push-up is an advanced movement. I’m not talking about the versions where you are leaning against a wall and performing a push-up. A proper handstand push-up goes from a handstand, down to a headstand position, and back up to a handstand again, with no other support than your hands.
And a full handstand push-up actually has you go even lower, so that your hands are elevated enough that you can dip your head and take your shoulders down all the way to your hands and then press up again.
This is a great skill and really distinguishes you as a strong handbalancer.

Below, I teach a lot of progressions, designed to take a person from the very beginning to the end goal. Some of you may find yourself going through the first few relatively quickly, while others may need to take more time, but once you’ve established your current level they will make you stronger, and will help you work up to the handstand push-up.
Even if you are already strong, start at the beginning and see where you are at from the first progression. You won’t lose anything by beginning there. If you fly through them you really haven’t wasted time; you’ve only proven that you are ready to move on.
Be patient, because for most of us, this is not a move that happens overnight.
Step 1 – Prepare Your Body
The initial work for this move may not look incredibly obvious for the Handstand Push-Up, but these exercises indeed demonstrate the fundamentals necessary for the skill.
| Exercise/Progression | Key Points |
|---|---|
| Bear Walk | - Drive butt into the air as high as possible |
| Bent Arm Bear | - Keep elbows pointing backward (not flared out) - Load the front of the body as much as possible |
| A-Frame Inverted Press | - Keep your elbows pointed back towards your toes - Lower yourself forward so that your shoulders are in front of your fingers |
| Elevated Inverted Press - on knees | - Keep your feet close to your butt as you lower yourself |
| Elevated Inverted Press - On Toes | - Focus on lowering yourself as much as possible |
| Elevated Inverted Press - On Wall | - Keep the knees bent, and straighten them as you bend your elbows to lower your body |
As I’ve said above, go ahead and try these exercises first before you decide to tackle the more difficult exercises. You should be able to do a minimum of 30 seconds of the exercise with a high level of technique quality before moving on to the next progression.
That may mean that you go through the first 3 exercises right away when you try them, but once you’ve found the level that is appropriate for you I recommend performing:
- 3-6 sets of 20 seconds of the movements, with 1-2 minutes of rest in between.
Work through these preparatory exercises slowly, until you feel comfortable with the final progression of the elevated inverted press. Then it’s time for the foundational work.
Step 2 – Build Your Foundation
When you’ve sufficiently prepared your body for this kind of work, the next step is to build a strong foundation for the Handstand Push-Up. The exercises I’ll teach you in this video are what will put you on the correct path to the full Handstand Push-Up.
| Exercise/Progression | Key Points |
|---|---|
| Jump to Tuck Handstand Repeats | - Be careful to slowly lower your head to the floor - don't slam it into the ground! |
| Jump to Bent Arm Stand (Tucked) | - Keep the knees bent to jump into a tucked bent arm stand |
| Jump to Bent Arm Stand (Straddled) | - Go slow and gradually decrease the angle of your arms |
| Jump to Bent Arm Stand (Straight Legs) | - Keep your elbows close to your sides - Make sure you're breathing |
| Handstand Lower to Headstand (Straddled) | - Slowly lower yourself while keeping legs in a straddle |
| Handstand Lower to Headstand (Legs Together) | - Slow and controlled - Keep elbows in |
For this set of progressions, I recommend moving to the next level when you can comfortably perform the movement 5 times in a controlled, high quality manner.
In a workout session I recommend performing:
- 5-7 sets of 2-3 repetitions of the movement. Do these as slow and controlled as possible, with 2-3 minutes of rest in between.
Even if you go no further than here you’ll already have built a tremendous level of strength in your upper body by going through these foundational exercises. But don’t let yourself stop here!
Step 3 – Practice the Components
Now that you’ve prepared your body and established your foundation, next up is working the unique points of balance and strength in the handstand push-up. In this next video I’ll teach you the essential components of the Handstand Push-Up – the lowering down and the press back up.
| Exercise/Progression | Key Points |
|---|---|
| Handstand Lower to Bent Arm Stand (Straddled) | - From straddle handstand, slowly lower into straddled bent arm stand |
| Handstand Lower to Bent Arm Stand (Legs Together) | - Make sure to move slowly - Always keep elbows in to your sides |
| Bent Arm Stand Press to Handstand (Tucked) | - Start from the tucked bent arm stand and press your body up into the straight leg handstand |
| Bent Arm Stand Press to Handstand (Straddled) | - Start from a straddle bent arm stand with a low straddle - Press up into straddle handstand |
| Bent Arm Stand Press to Handstand (Straight Legs) | - Start in tucked bent arm stand but then straighten legs into full bent arm stand - Exhale as you press up into straight leg handstand |
Here I recommend moving to the next level when you can comfortably perform the movement 2 times in a controlled, high quality manner. And in training you’ll want to perform both the level below where you are at, as well as your current level. So you’ll be doing two of the movements each time you train.
Because of the increased intensity of these exercises, I recommend training them as follows:
- 3-5 sets of 1-2 repetitions of each movement. Do these as slowly and controlled as possible, with 2-3 minutes of rest in between.
Step 4 – Put the Pieces Together (Full Handstand Push-Up)
Now on to the final step – the Handstand Push-Up! In this video I’ll show you one last progression, and I’ll share a couple variations of the Handstand Push-Up.
| Exercise/Progression | Key Points |
|---|---|
| Headstand Press to Handstand (Straddled) | - Start from headstand straddle - Exhale as you press up into handstand |
| Headstand Press to Handstand (Legs Together) | - Keep elbows in - Point toes |
| Full Handstand Push-Up (Straddled) | - Slow and controlled - Touch head to ground - Exhale as you press up - Press down into ground as hard as you can |
| Full Handstand Push-Up (Legs Together) | - Get head as close to ground as possible before pushing back up |
I recommend going on to the handstand push-up when you can do 2 or 3 headstand press to handstands in straddle position. And as in the last section, perform the progression one level below in addition to the one you are at for training.
- 3-5 sets of 1-2 repetitions of each movement. Do these as slowly and controlled as possible, with 2-3 minutes of rest in between.
That’s the Handstand Push-Up! Slow and controlled is the name of the game with any variation you practice. It is the demonstration of balance and disciplined form and technique that makes a handstand push-up so impressive.
Step 5 – Use Props for an Increased Range of Motion and Difficulty
This advanced version of the Handstand Push-Up is where you increase the range of motion by lowering between two props. Here I am using canes, but you can also set up blocks or parallel bars, anything that provides a solid support for you to lower your head down past your hands.
| Exercise/Progression | Key Points |
|---|---|
| Advanced Version (with Knees on Block) | - Keep knees on a block as you lower yourself between two props |
| Advanced Version (with Feet on Block) | - Straighten legs and come up on toes - Lower yourself until shoulders go past hands |
| Advanced Version (with One Leg in Air) | - Make sure to work on both sides - Lower as much as possible |
| Advanced Version (Full, in Straddle) | - Start in a straddle handstand with hands on two props - Lower yourself as much as possible, then push yourself back up |
| Advanced Version (Full, with Legs Straight) | - Start in straight leg handstand with hands on two props - Keep elbows in - Keep breathing - Press down as hard as you can |
For the first three progressions I show, move on when you can perform 7 reps easily. And train them as follows:
- 3-5 sets of 4-6 repetitions of the movements, with 1-2 minutes of rest in between.
For the last two, treat these as the last steps before the handstand push-up without props. Go on to the full press when you can perform 2 or 3 headstand press to handstands in straddle position.
- 3-5 sets of 1-2 repetitions of each movement. Do these as slowly and controlled as possible, with 2-3 minutes of rest in between.
Example of A Handstand Push-Up Training Session
Here’s a sample training session demonstrating how this all fits together:
- Warm-Up – Spend a few minutes warming up your shoulders and your wrists
- Freestanding Handstand Practice – Spend 10 minutes on this, resting as needed between attempts.
- Main Exercise Progression – Here is the meat of the practice when you’ve determined the progression that is appropriate for your current level. For example, let’s say your level is the Jump to Bent Arm Stand. You’ll perform 6 sets of 3 repetitions of that progression.
- One Repetition Trial of the Next Progression – Only do this if you are feeling good after your main exercise progression work. In this example, you’d perform one repetition of the Handstand Lower to Headstand.
- Cool Down – You’ll cool down with a simple shoulder mobility routine.
- Regular Training – After you do your Handstand Push-Up work, you can finish up with whatever other training you’re working on.
The Only Way Up A Mountain
Learning the handstand push-up is a huge project. When I look at something that big, I like to think about Mt. Whitney in California. At 14,500 feet it’s the tallest mountain in the contiguous United States.
But it doesn’t take any technical knowledge to climb it. You can just walk up.
Most people who climb Mt. Whitney start at about 4 am, while the stars are still out over the Sierras. And as long as you’re in pretty good shape there’s only one secret to getting to the summit: Keep taking the next step.
Challenging physical skills are a lot like that. As long as you have the right path (like this tutorial), the only secret is to do a little every day.
But there are things you can do to give yourself a better shot at getting the handstand push-up (or any skill). And a foundation of whole-body strength and control is essential for effective practice.
If you want to improve your foundation, start with our free Bodyweight Circuit video workout.
It features six exercises—including variations from easy to advanced—that will help you develop strength and control throughout your body. We’ve included programming tips to help you tailor it to your goals. And you can do it anywhere without any equipment.
In other words, it’s the perfect tool to start building a strong foundation for any skill.
Use Skill-Based Training to Build Practical Strength
Integral Strength is a skill-based strength program that helps you build practical skills and strength that carry over into your most important daily activities.
