Why do you want to do a muscle-up?
No, it’s not a trick question, I’m really asking!
Maybe because it’s a pretty sweet physical trick to post on instagram? Nothing wrong with that at all, it’s a great demonstration of strength and control, and the ability to do it well says a lot about your dedication and effort to your training.
Also, it’s a nice challenge that can be a great motivation for people. So important because honestly some days are harder than others to keep up with working on our health and fitness.
Yet in even with fundamental exercises like pull-ups, it’s not really that you have the ability to do that cool trick or burly strength move.
 It’s what you’ve learned in all the proper training and practice to achieve them.
You can absolutely find a way to brute force your way over the rings or a bar. But what did that really do for you? And it sure as hell didn’t look pretty!
Not all muscle-ups are created equal.
We’ve all seen people at the gym flinging themselves up over a bar. (Hell, a lot of us have probably done it.) But it’s that smooth and controlled muscle-up that not only looks way better, you can just sense how much it demonstrates excellent strength and control.
Developing all that strength and control isn’t easy, and a lot of people get stuck.
And that’s why we made this tutorial to break down the muscle-up so you can tackle it the smart way, and build the skill and precision you need to do a beautifully clean muscle-up on the rings.
Muscle-Up Tutorial on Gymnastic Rings
Skills like the muscle-up involve more than just raw strength. There are plenty of people that can do a dozen pull-ups and a dozen dips but can’t do a single strict up muscle-up.
Why is that? Because correct training for the muscle-up is more than just finding the “right progressions”, it’s knowing exactly how to best coordinate and express your strength. So it’s worth asking yourself “are you building the right kind of strength?”.
In this video, I’ll show you in depth and step-by-step how to get your first muscle-up. After watching, scroll down for more details on why we teach it this way, and how best to learn and apply it.
Wondering about using bands? Here’s my thoughts on that…
| Steps | Description |
|---|---|
| False Grip | • Place hands high on the rings • Bend wrists to allow the rings to hang on the hands |
| Baby Muscle-Up | • Keeping feet on the ground, pull hard until your shoulders are over your hands • Keep elbows in |
| Baby Muscle-Up Transition Work | • Just work on the transition portion of the Baby Muscle-Up • Practice repeats of this transition to get comfortable and strong with it |
| Jump Muscle-Up | • Start with feet on ground like in the Baby Muscle-Up • Pull yourself up to the rings, then jump up into top position so your feet leave the ground at the top |
| Low Muscle-Up | • Starting again with feet on the ground, pull your knees up then jump up into the muscle-up |
| Full Muscle-Up | • Place the rings high enough so that your arms can be straight while standing beneath them • Pull your body hard up to the rings • Transition your body from below the rings to above the rings • Push hard to put your body into the top position |
Fundamental Break Down of the Ring Muscle-Up
When you see someone performing a nice smooth muscle-up, it can be intimidating! That’s why it’s helpful to split the performance of the muscle-up into it’s component parts. This is also one of the fundamentals in the GMB Fitness Method, analyzing each particular movement skill to find how each individual can best learn and practice to own it!
This is much more useful than having a set “standard” that every person needs to meet before they can “move on” to the next thing. That kind of process can make sense on paper but in the real world, some people will be better than expected in one component and/or lagging on another.
Great coaches and teacher do much more than follow a rigid template. They not only know progressions and breakdowns, but how to adjust and personalize training as needed.
With all that said, here are the four fundamental components of the muscle-up:

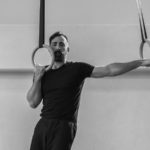
- The Grip: For the strict muscle-up, we’ll be using the false grip. With this grip, the rings are set in the hand nearer to the crease of the wrist. This is definitely an awkward position for most people at first, and it takes some time and practice to get the technique down, and to figure out the tweaks in positioning that are best for you.
- The Pull: The next step is pulling your body up as strongly and smoothly as possible. This means having a good proficiency in pull-ups. A strong pull is key to a good muscle-up, and without it, you’ll be unable to do one without swinging and kipping.
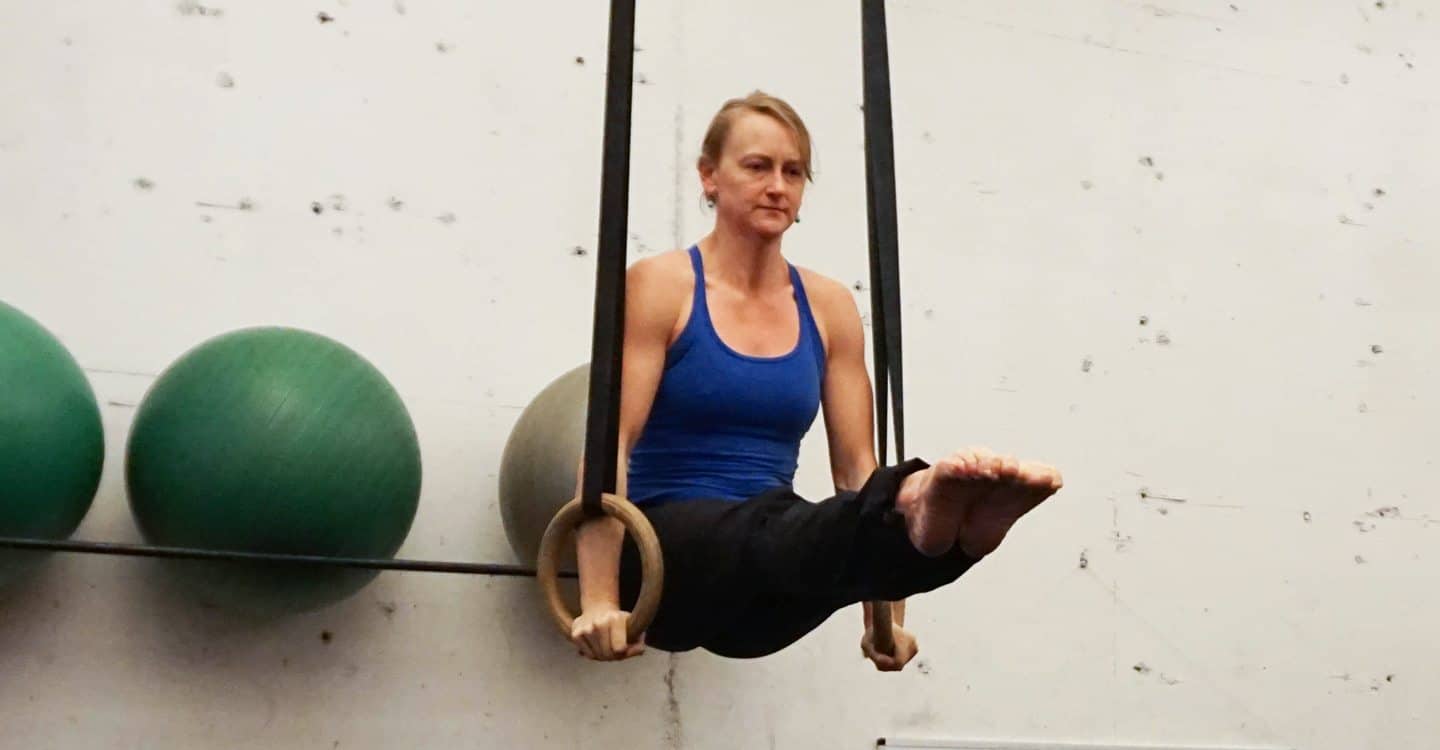
- The Transition: This is the part where most people get stuck on the muscle-up. Think of this as “putting on your t-shirt.” You’re pulling yourself to the top and then there’s a transition to pushing yourself up for the dip. It’s common to get stuck here if you’ve got issues with shoulder mobility or strength. Click here for an article that will help you work on fixing that.
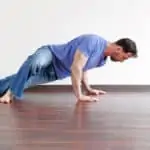
- The Push: Once you’ve gotten through the transition, you’re golden for the last part. Keep your body tight and strong, and land in top position with the rings turned out. If your pushing muscles could use some work, our push-up tutorial will help.
Again, looking at the breakdown of the muscle-up it’s “simple but not easy”. If it was as easy as 1,2,3,4 everyone would get it on the first try. And we all know that’s not the case…
This is why over the last dozen years of training thousands of clients, we’ve found the various patterns and idiosyncrasies that people fall into, and know the ways to guide them as they learn how to achieve this and and many other skills.
But when you know these fundamentals, apply effort, and personalize your training as needed getting a solid muscle-up is absolutely attainable!
👋 Common Questions and Concerns
My hand/wrist hurts a lot when I use the False Grip. What am I doing wrong?
Some of it is getting used to the positioning, similar to building up callouses. But a big part of it is the proper technique to keep the pressure mostly on the “meat” of your palm, instead of on the bones/ligaments/tendons.
Trial and error for how much to rotate and position your hands takes patience and time but you will get it!
How strong do I need to be to start working on a muscle-up?
A good rule of thumb is being able to do 5 snappy full range of motion pull-ups and 5 good full range of motion dips. If you are able, or close to this, you’re good to go!
How about a muscle-up on a straight bar?
You can use the principles we teach here to help your performance on the bar muscle-up, but there are nuances on the technique that require a bit of a different approach. Our friend Daniel Vadnal has a nice quick video with some great tips for the bar muscle-up.
Scaling the Muscle-Up: Using Bands?
There’s a lot of ways to train your transitional strength, and people loooooove using bands and other special equipment. Lessening your weight is an easy answer, but it also happens to be the wrong answer.
I’ve got a better solution:
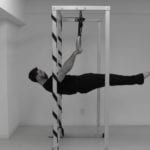
The Baby Muscle-Up
To make a long story short, bands offer too much support at the bottom (where you probably don’t need it) and not much help during the transition, where you need the most help. Also, making yourself lighter doesn’t solve the primary reason why most people can’t do a strict muscle-up. The proper motor control and coordination in the transition.
The Baby Muscle-Up gives you both the correct movement pattern along with a way to quickly adjust the support needed (even within the rep itself!). This specific learning along with adjustable variable resistance.
It’s the correct answer to “how can I learn the muscle-up?”
Speaking of popular methods that fall short for strength-building…
Skip the Kip: Why We Prefer the Strict Rings Muscle-Up Over the Kipping Muscle-Up

We feel so strongly about this that we made t-shirts to spread the message.
If you walk into many (not all) CrossFit gyms around the world, you might see people doing kipping muscle-ups, which are very different from the muscle-up technique we’ll describe below.
A kipping muscle-up is where you use momentum to get yourself up and over the rings. This is very different from the strict muscle-up we teach, which uses strength in every part of the movement.
Depending on your background, you may have strong opinions about the kip. Or not. But this issue tends to be a divisive one in the training community.
Here’s why we prefer the strict over the kip:
Safer on the Joints
The primary reason to learn a strict muscle-up first is to condition your muscles and joints appropriately to lessen the chance of injury.
There is nothing inherently wrong with learning a kipping muscle up if your body can handle it.
But for most everyone (not just total beginners–even stronger people won’t necessarily be used to the forces and stresses from a kipping muscle-up because it isn’t like what they have done before) going right into kipping style will be too much and likely cause overuse problems if not outright trauma.
Use the form we teach below to get really strong with each part of the movement, and your joints will thank you.
Gives You Better Control Over the Forces

If you’re Camille Leblanc-Bazinet, you can kip with complete confidence that your body will do what you’ve trained it to do. But she’s a champion. You’re probably not. Best to stick with what’s definitely safe for you.
Knowing how to kip can be a useful skill, as it teaches you how to use momentum and coordination, but if not done smoothly it’s very jarring on the body.
The kipping muscle-up also really shouldn’t be done as a repetitive exercise because you can’t control the forces well enough. In contrast, with a strict muscle-up or pull-up, you can do as many reps as you can with perfect form, and then when fatigue hits you can simply stop. No matter where you are in the movement, you can lower yourself safely without risk of injury.
Because of the momentum in the kipping muscle-up, you could easily be placed in a position where you can’t get out of it with control if you need to.
If you do want to learn the kipping muscle-up, you would be much better off learning the strict muscle-up first so that you can do the kipping muscle-up with control. This will be safer and much less frustrating in the long run.
What if You’re Stuck? Here’s How to Push Through Plateaus with the Muscle-Up

If you’re stuck on the muscle-up, using an integrated skills approach might be just the ticket.
You’ve likely run into some trouble with the muscle-up, or you probably wouldn’t be reading this article.
It’s a tough move, and just being able to do pull-ups and dips doesn’t in any way mean you’ll be able to put those together into a smooth and clean muscle-up–not without specific work on the transition (which is covered extensively in the video above).
But like any tough skill, you may reach plateaus in your progress because progress is not linear.
You may have three or four weeks where you’re getting better and better each week, and then another few weeks where you feel kind of stagnant. That’s normal.
But when you work on complementary skills concurrently, you’ll find that those stagnations are less common. When you hit a plateau with one exercise, you continue making progress with another, and that way you’re always working toward your goal.
Muscle-Up Course & Coaching Program
This is it – our complete system for learning the muscle-up, from addressing foundational strength deficits to tightening technical nuances in your form. Go at your own pace, or join our 6-week coaching program to get direct feedback from Ryan and our coaching team.


Hi, I'm Ryan Hurst 👋
After a training accident ended his competitive gymnastics career, Ryan moved to Japan, where he spent close to 30 years training and competing in judo, kendo, and other martial arts until another injury made him rethink what training is for.
As Head Coach, he leads program design and teaches every week on our YouTube channel. His book, Stay On The Mat Forever, is aimed at helping you keep training for decades. He loves handstands, dogs, and hiking.