Looking for those sweet Bruce/JCVD vibes but don’t have a yellow jumpsuit or two Volvo trucks handy?
The kip-up – or floor kip – is said to have originated in martial arts training, but just as in most movement skills it’s been done by everyone from acrobats to dancers to people just messing around with what they can do. It’s a flashy expression of physical play and exploration and demonstrates a strong confidence in your movement capabilities.
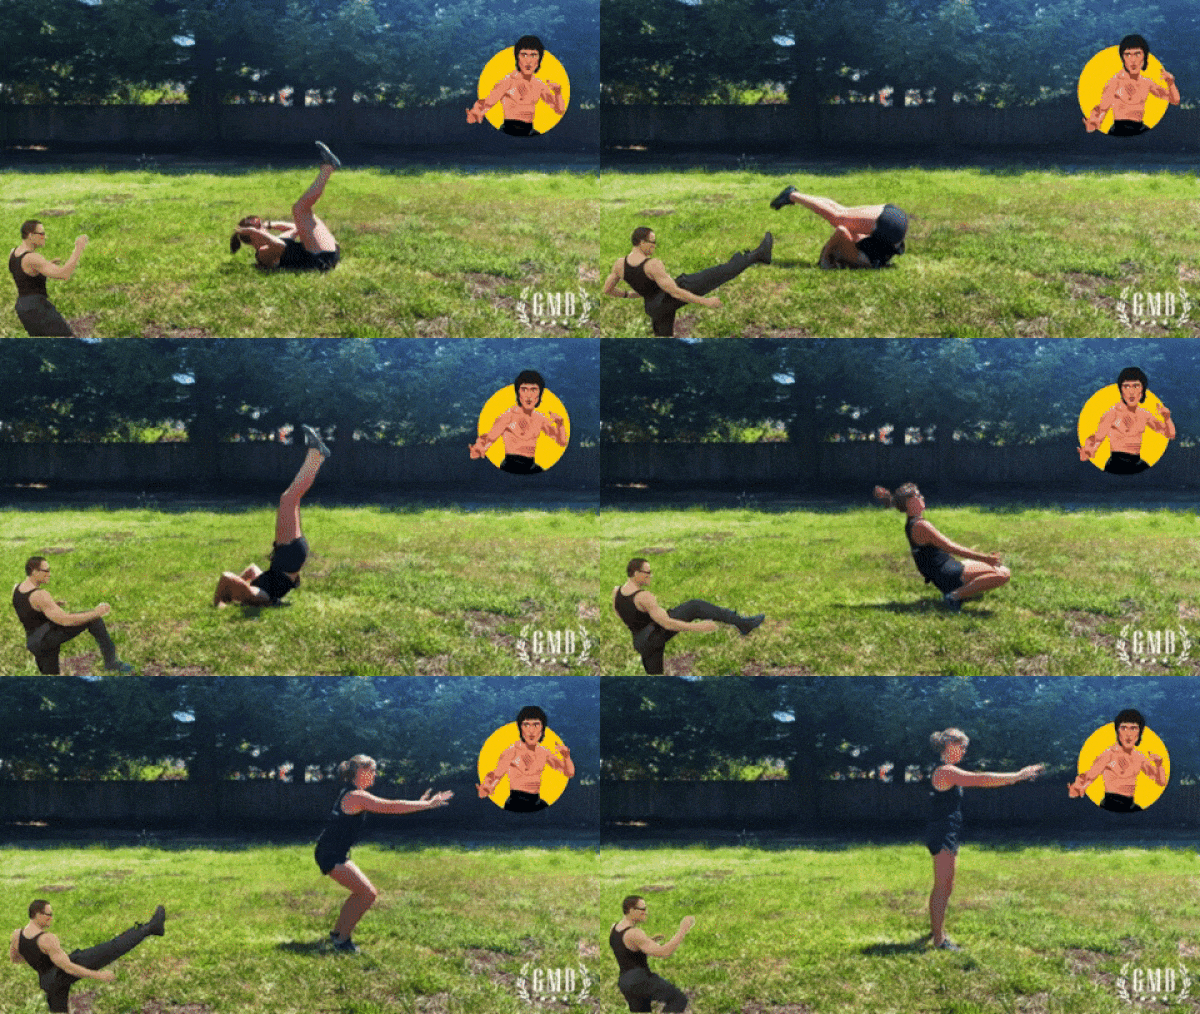
The kip-up takes you from flat on your back to up on your feet in one smooth motion, it’s amazing to see and do.
Is it an absolutely necessary skill? No, but it’s just inherently fricking cool!
So kip-ups are not an important skill, but they’re well worth tackling because of the great feeling of achievement and the exhilaration of making it happen. We’ll teach you how to do this step-by-step without undue frustration and danger.
It takes lots of practice, but the good news is that even just working towards your kip-up is helpful for your physical training and more importantly your attitude about your training.
The Basic Kip-Up Progression
Where do you start? At the beginning of course! In the GMB Method, we reverse engineer a movement skill not just into freeze frame parts, but also make sure that each step provides you with a sense of purpose. It’s not enough to just copy what someone is doing, if you understand the intention you’ll learn much faster. I’m sure most of us have tried imitating something cool and got a little bit bruised up from it… *raises hand sheepishly*
That can for sure be an inevitable part of the process but we can mitigate the worst of it by improving our understanding of how best to practice.
First, there are 3 things you’ll need to consider when working on your Floor Kip:
The Plow Position
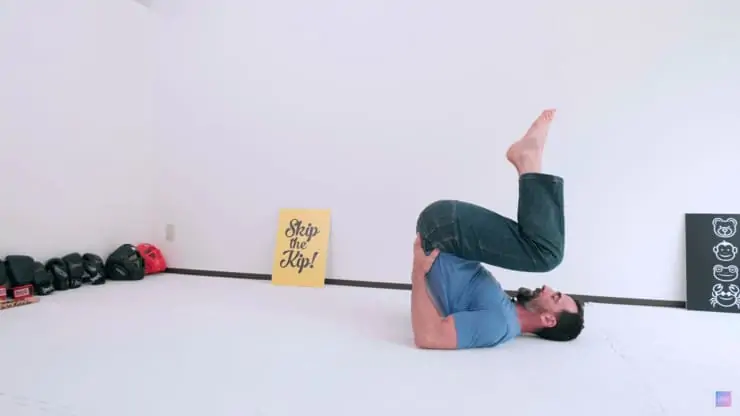
This is the first position you’ll need to get comfortable in and that can be difficult for people with neck and upper back tightness. Take your time and work on just moving into and out of the posture, concentrate on breathing evenly and relaxing into the position for a few breaths and you’ll find your comfort.
You’ll rock back with your knees up and tucked, with your head flat on the ground. The further you bring your knees back toward your ears, the more power you’ll be able to generate as you kick your feet up and then downward toward the ground.
Next, you’ll work on the Low Bridge. For more detailed instruction on this go here.
The Low Bridge Position

See how Ryan has good flexibility and strength in his shoulders and wrists to stretch them back while getting his upper back off the floor.
You can already tell from this that you’d benefit from training your flexibility and strength in your shoulders and wrists, and good news, simply practicing this position will help that. The formula is, as always, work into the position slowly, into and out of it and then progress hold times with controlled steady breathing.
From here, you’ll want to work on bailing – abandoning the movement safely when you know it’s not gonna happen –
The Kip Up Bail
While not technically a position, it’s essential to know because you’ll want to learn how to “fail” repeatedly and safely. The kip-up is a very quick movement and eventually you’ll need to just go for it and see. So knowing how to bail out of a missed attempt properly is key.
Since this is difficult to show in a single image, watch the video tutorial below. 👇
Floor Kip Tutorial Video
🤔 Troubleshooting Your Kip Up
When you see Ryan or van Damme do it, the kip-up looks effortless, and that’s how it’ll be when you put your time in!
For learning anything it’s lots of good – and bad – repetitions that take you where you want to be.
But there are some important details besides practicing the positions and movements of the kip-up and knowing these will help make this a much smoother process.
You need a good mix of strength, flexibility, and body control, which makes up the groundwork of all our programs.
❌ The Wrong Way to Learn Floor Kips
You might find yourself searching Google, watching YouTube videos and following a tutorial that breaks down the steps of the movement from start to finish.
But many tutorials only show you how it looks, while glossing over the building blocks that make it possible.
So you might give it a go, but you can’t quite get it because you lack the upper body strength or flexibility in your back and wrists.
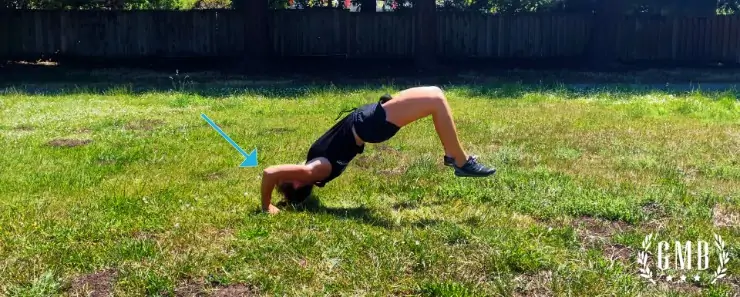
Look at the upper back, shoulder, and wrist flexibility that enables Rose to get her hands in position to spring upward:
Or you don’t have the hip and ankle flexibility to land properly and get your weight shifted over your feet.
For instance, good ankle and hip mobility will allow for a full squatting position. See a couple of different full squats here:
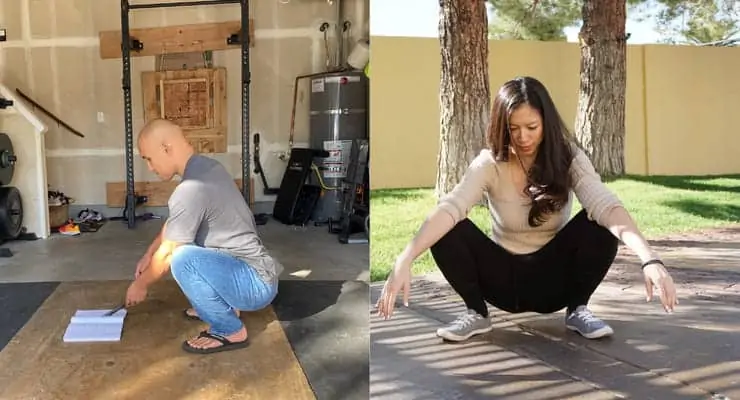
Understanding your weaknesses will let you know what to start working on, assess to progress! By determining a strength deficit or a lack of flexibility, you can begin to work on the building blocks that allow you to learn this skill.
This is why assessment is baked in to the GMB Method and is an intrinsic part of all of our programs.
Use Assists to Build Your Kip Up
While the actual attempts at the kip up are what will make it eventually happen, it can be a bit too fast to really hone in on the sensations of what a kip-up “feels like”. This is where using assists to replicate the motion can be very helpful.
Here you see Eduardo using a bench to help on portions of the kip up:
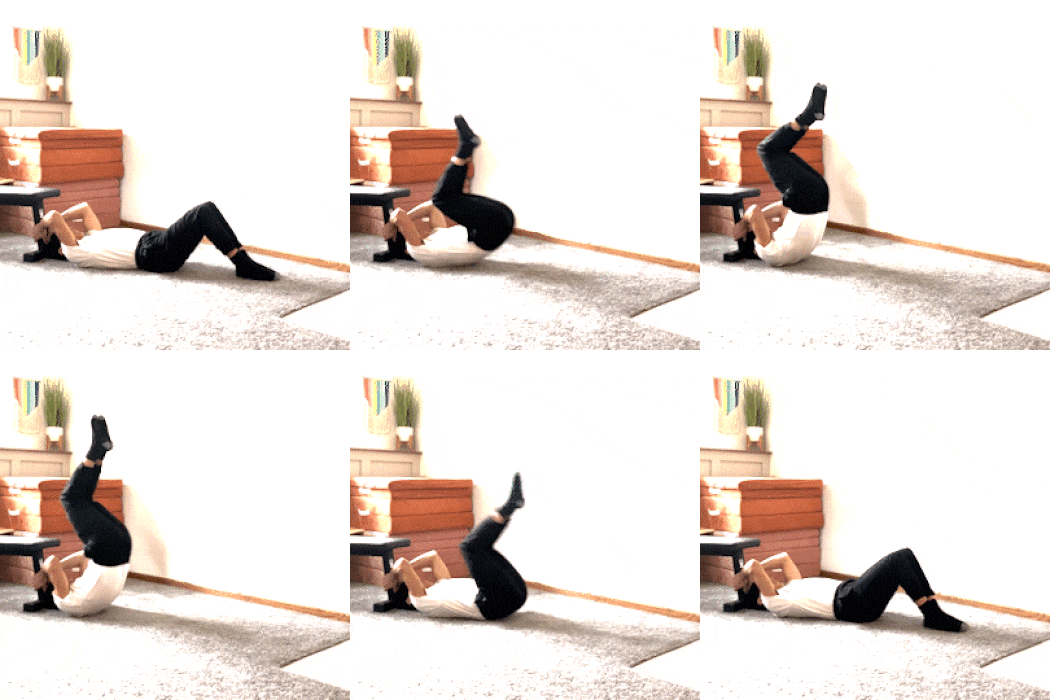 In this first one, holding on to the bench helps you to slow down the rolling back and rising up in the beginning. Going through this slowly and really focusing on how your body feels helps when you go back to the full repetitions.
Try sprinkling this in between kip-up attempts and see how it goes!
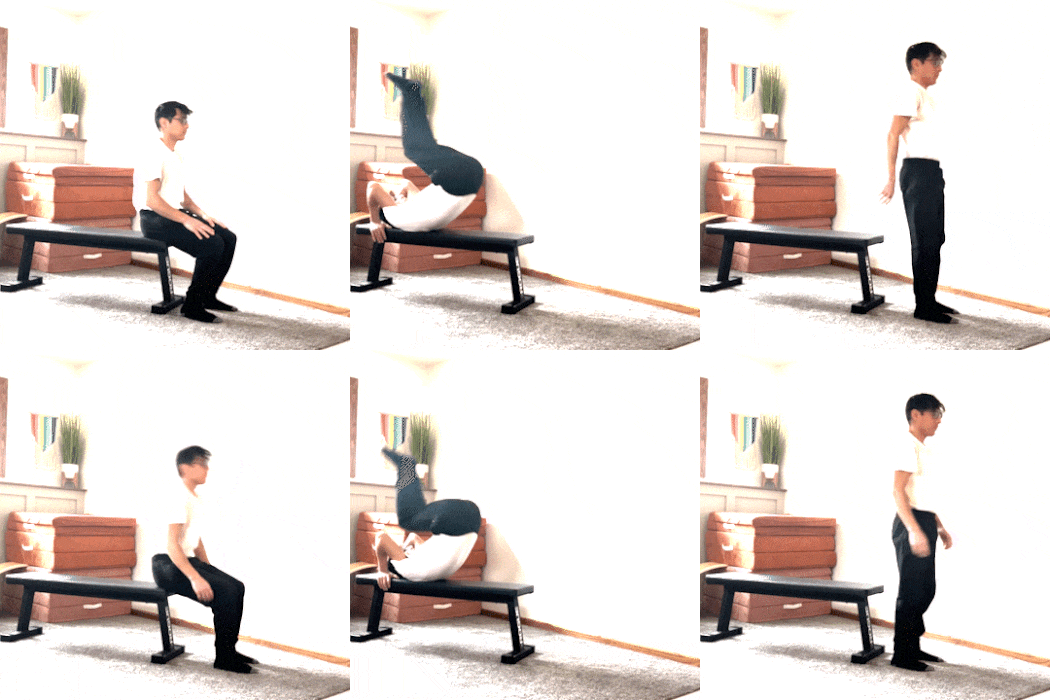 Next, he’s using the bench as an elevated surface to practice the “popping up” part of the move. Since you’re already up off the floor, you can concentrate on the smoothness and positioning.
This again helps you in understanding how the movement should feel, and now with the benefit of performing it at the same speed. And not worrying about crashing down is also super helpful!
Unlock The Floor Kip: Requisite Strength & Flexibility
The Floor Kip requires your entire body to work through various flexed and extended positions.
Think about it; from start to finish, you need a good amount of strength in your legs and arms, at least enough for a squat and push-up.
You’re using your legs to kick your body up and forward and then using your hands to spring your body off the ground with your arms and shoulders, all in a fluid motion.
Since this movement requires a good mix of strength and mobility, you may have to do some dedicated work on various areas of your body before you can start practicing the movement.
For example, if your lats, shoulders, and/or wrists are tight, you probably can’t get your hands onto the ground while lying on your back without some strain or compensation.
Addressing Your Tight Back, Hips, and Ankles
For a healthy range of spinal extension, you’ll want both a strong and flexible back.
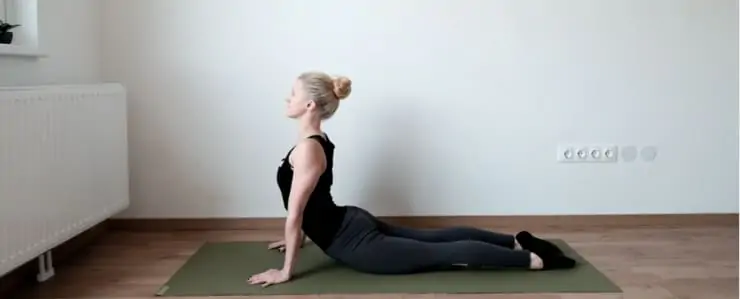
In addition to that if you have restrictions with your squat, you’ll first want to work on improving your flexibility in your lower body before you’ll be able to safely spring upward and land properly.
Enhancing Your Lower Body Mobility:
- Improve hip mobility with these 8 focused stretches you can do any time of the day.
- Increase your ankle mobility with a simple routine for your feet and ankles.
- You can improve your hamstring flexibility with 6 tips we use to release tight hamstrings, making the squat position more comfortable.
How To Improve Upper Body Mobility:
- Use our shoulder mobility routine to increase your upper body range of motion.
- Pay attention to your wrist strength and flexibility too.
Or frankly, you can take care of all of this by working with our programs…
Building Confidence By Practice
Now that you know how to make the improvements physically, let’s talk about the confidence portion of the Floor Kip.
You can be the most athletic person in the world, but if you don’t have the confidence, you may not try it out. And if you do and fail, you might get scared and never revisit it again. Yet ironically, the way we build confidence is through practice.
Practice builds competence and competence builds confidence.
👋🏻 Know this: you’re gonna screw up your first few tries. You’re going to fall. It’s inevitable. Everyone does.
Also, confidence isn’t just built from success, it’s also developed through knowing you can persevere despite setbacks and seeing how you’ve grown from the first step to where you are now.
How to Practice and Work it into Your Training
If you already have the requisite mobility and strength, you will be fully prepped to start playing around with this movement.
Here’s an examples of how that might look:
Don’t Stop With The Floor Kip
Skills, like the Floor Kip (kip-up), handstand, or cartwheel, are all built on basics and attributes.
When you create a strong foundation in the basics, like adequate mobility, strength, and coordination, you’re then able to acquire more difficult skills as a result.
For example, when you’re able to do a Kip-Up, the strength and mobility you gained in the process will lend itself to making other skills like handstands much easier to accomplish.
In our Elements program, we walk you through the whole process of building your movement foundation.
You’ll get stronger in your shoulders, core, and lower body. You’ll resolve tightness throughout your body and build useful flexibility. And you’ll the kind of skillful body control that separates true athletes.
So if you want a body that’s ready for Floor Kips and all kinds of other skills, give Elements a look.
If you’re strength and mobility are in place, you can learn the Floor Kip along with 13 other slick moves AND tons of cool ways to combine them into fun flow routines… that’s all covered in our “level 2” movement program: Sequences.
Take the Next Step to Movement Skill
Learn to express your strength and agility in new ways. Sequences integrates progressive motor complexity, conditioning, and all kinds of fun challenges into our most comprehensive training program.

