If you’ve been working on a pistol squat for a while and it still isn’t coming together, I want you to consider something. The problem probably isn’t your strength. It isn’t your flexibility. And it definitely isn’t a lack of effort.
 It’s the way the pistol squat is usually taught.
Most progressions work from the top down. You stand on one leg, lower yourself a little further each session, and hope that one day you’ll reach the floor without falling over. That approach ignores the part that actually matters: being stable at the bottom and having enough strength and control to stand back up.
The hardest part of the pistol isn’t getting down there. It’s what happens once you’re down.
That’s why I teach it the opposite way. We start at the bottom and work up. It’s not the conventional approach, and it looks a little different from what you’ll see in most tutorials. But this method has worked for thousands of our clients who were stuck with traditional progressions, and I’m going to walk you through the whole thing.
I’m also going to show you how to figure out exactly what’s holding you back, so you’re not just grinding away at the wrong thing.
The Bottom-Up Pistol Squat Progression
In this video, I work with Levi, who can do a solid pistol on one side but struggles on the other. I use our Assess, Address, Apply framework to figure out what’s limiting him, fix it, and then apply the bottom-up progression. Watch how it comes together:
Here’s the progression broken down step by step:
| #1 – Address Your Sticking Points | Before jumping into the pistol itself, identify what’s holding you back. For most people, it’s ankle dorsiflexion. The modified lunge (pulsing the knee forward with the heel down) and the Frogger (jumping into a deep squat and driving heels toward the floor) are two of the best drills for this. You’ll see both in the video above. |
| #2 – Deep Squat | Make sure you can sit into a deep two-legged squat with your butt close to your heels and your back reasonably upright. If you can’t get here comfortably, spend time here before moving on. |
| #3 – Roll Back | From the deep squat, grab your ankles, tuck your chin, and roll backward. Let your hips come off the ground slightly. Get comfortable with the motion. |
| #4 – Roll Up Into the Squat | Roll back, then use the momentum to roll forward into the deep squat. Pull your heels close to your butt as you come forward. Work this until it feels smooth. |
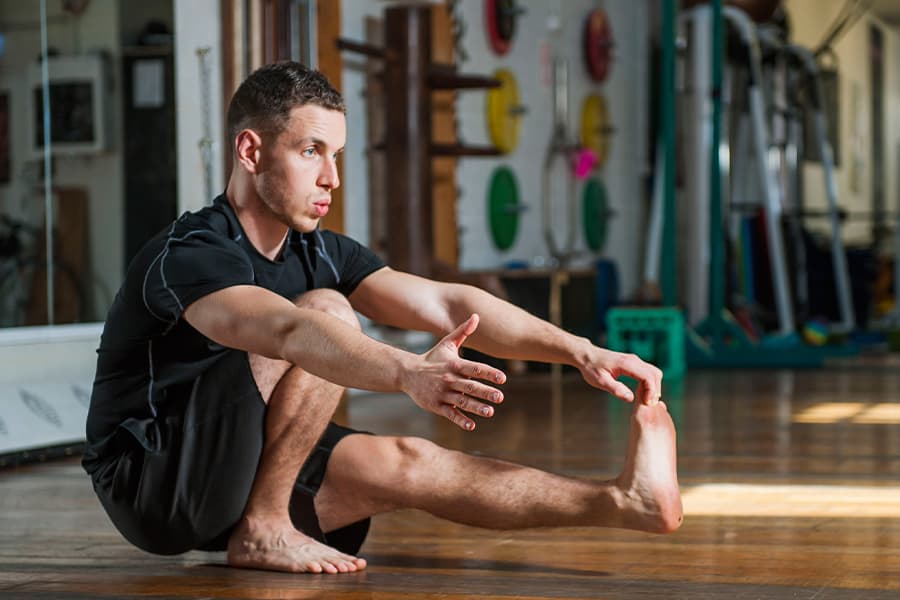
| #5 – Roll Up on One Leg | Same roll, but this time extend one leg as you come forward. Use your hands on the ground for support. Bring the working foot toward the center of your body, not out wide. Just pop up slightly into the bottom position. |
| #6 – Pop Up a Little Higher | Gradually work on standing a bit higher out of that bottom position. This needs to be explosive. Lift your chest and drive your working leg into the ground. Don’t rush to stand all the way up. |
| #7 – Full Pistol Squat | Once you can pop all the way up to standing, start from standing: squat down on one leg, roll back, then come back up. When you can control both directions, you’ve got it. |
Give this time.
Each step is a practice that builds specific stability, mobility, and strength, so you’ll need to train each one up gradually to really see the impact.
Why This Works Better Than Top-Down Progressions
The reason I’ve been teaching it this way for years comes down to one thing: the bottom position is where most people fail, so that’s where you should spend the most time.
When you start from the bottom, every rep begins in the hardest part of the movement. You build stability and strength exactly where you need it. There’s no stretch reflex to bail you out, no bouncing off the bottom. You develop real control from a dead stop.
The other benefit is that using your hands for support lets you work in the bottom position safely. You’re not forcing yourself into a range of motion you’re not ready for. You’re gradually building toward it. That’s how you avoid tweaking a knee or ankle, and it’s honestly how you get there faster.
What’s Holding You Back?
If you tried the progression and ran into trouble at a specific point, that’s useful information. Most people get stuck because of one of three things:
Ankle Mobility
This is the most common issue I see, and it’s exactly what was limiting Levi in the video. If your heels come off the ground in the deep squat, or you feel a hard block in the front of your ankle when you try to drive your knee forward, you’ve found your bottleneck. (If your heels lift the moment you sit deep, our breakdown of why your heels come up digs into the same issue.)
The modified lunge and Frogger from the video are your best tools here. The lunge targets ankle dorsiflexion directly: pulse the knee forward five times, then hold the end range for up to 30 seconds, driving the heel into the ground. The Frogger puts that range of motion under load, which is how you make it stick.
For a more thorough routine, check out our full foot and ankle mobility tutorial.
Deep Squat Depth
If you can’t get into a deep two-legged squat with your butt near your heels, the pistol is going to be a struggle. This usually comes down to hip mobility, and sometimes thoracic spine stiffness that pulls you forward.
Work on your basic bodyweight squat first. Spend a few minutes a day just hanging out in the bottom of your squat, and the depth will come. If your spine rounds forward excessively, some thoracic mobility work will help.
Single-Leg Strength and Balance
You might have the mobility but not the raw strength to push yourself up on one leg. That’s normal. Most people don’t train single-leg strength, so the first time they try it, it feels wildly unstable.
Front and back scales are one of my favorite ways to build this. They look simple, but they challenge your balance and hip strength in a way that carries straight into the pistol. Start with those and practice the bottom-up roll progression with hand support until the strength catches up.
Form Tips That Actually Matter
Once you’re working the progression, keep these cues in mind:
Sit back, not forward. Think about getting your butt to your heel rather than driving your knee forward. This creates a better angle for your glutes and hamstrings, which can generate a lot more force than your quads alone. It also improves your hip mobility over time.
Pause at the bottom. Don’t rush through it. A brief pause in the bottom position builds real strength from a dead stop and forces you to find your balance point. If you’re bouncing off the bottom, you’re getting the rep but not getting stronger.
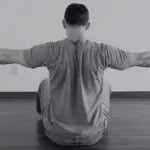
Use your arms. Start with arms out to the sides for balance. As you squat down, bring them forward. As you stand up, bring them back out. This isn’t cheating. It’s smart mechanics.
Respect your body’s current range. If you can only squat halfway down with control, that’s your current working depth. Go there with good form, pause, and come back up. Trying to force deeper than you can control is how you get hurt, and getting hurt is the slowest progression of all.
Build the Foundation That Makes Skills Like the Pistol Possible

Get Our Free Bodyweight Training Video
The pistol squat demands strength, mobility, and control working together. This free 20-minute routine hits all three, and it’s a great complement to your pistol practice. We’ll also send you our best tutorials and training tips.
Where the Pistol Fits in Your Training
The pistol squat is a great skill and an honest test of what your legs, hips, and ankles can do. But it’s one piece of a bigger picture when it comes to single-leg strength.
For most people, I actually recommend starting with the shrimp squat. It’s easier to scale, keeps your weight balanced over the midfoot, and builds the kind of quad and ankle strength that carries over into everything else. In this video, I’ll show you why:
The peacock squat (our name for the curtsy squat) adds rotational strength and hip control on top of what the shrimp gives you. It’s trickier to learn, but the ability to handle off-angle forces is something most training programs completely ignore, and it’s exactly the kind of strength you need for real-life movement.
Both of these are exercises we teach in Integral Strength, and they’re the foundation for more complex movements like the coffee grinder and swipe that appear in our Sequences program.
If you want to dig into the differences between the shrimp and pistol, we’ve got a full shrimp squat vs. pistol squat comparison.
The point is this: the pistol isn’t a dead end. The strength, balance, and mobility you build training for it feed directly into other skills. And if you find that the shrimp or peacock fits your training better than the pistol does, that’s a perfectly good outcome.
Common Pistol Squat Questions
My knee travels forward past my toes. Is that a problem?
Not in the way you’ve probably been told. We’re not going to pretend that knees past toes will destroy your joints. That’s a myth we’ve broken down in detail.
What I will say is that you’ll get a better pistol if you think about sitting back rather than pushing forward. It takes more hip mobility to get your butt to your heel with your chest up, but it also lets you use your glutes and hamstrings, not just your quads. That’s where the real strength comes from.
Your low back is rounded at the bottom. Isn’t that dangerous?
No. Your spine is designed to flex. At the bottom of a pistol, your hips are fully flexed, and for most people the spine will round. That’s fine. Your back isn’t bearing load in that position, so there’s no mechanism for injury. A spine that can move through its full range without pain is exactly what we want.
Is it normal to feel a stretch in the front of my shins and ankles?
Yes. This position is unusual for most people, so your body needs time to adapt. That stretching sensation will decrease as your ankle mobility improves. Just don’t force yourself deeper than your current range allows. Nothing slows you down faster than an unnecessary injury.
Do I need a stronger barbell squat to do a pistol?
There’s no real correlation. Pistol squats require balance, mobility, and single-leg coordination that a barbell squat doesn’t train. I’ve seen people with a big squat number who can’t do a pistol, and people who’ve never touched a barbell who nail it. Just practice the pistol progression and you’ll get there.
Pistols feel impossible. Is there an alternative?
Absolutely. The shrimp squat is easier to get started with and builds a lot of the same qualities. I covered this in the section above, but if you want the full breakdown, check out our shrimp vs. pistol comparison.
And honestly, if the shrimp squat turns out to be the movement you stick with long term, that’s a great outcome. The goal isn’t to collect skills. It’s to build a body that works the way you need it to.
Train the Single-Leg Strength the Pistol Actually Needs

Still Building Your Foundation?
If a deep two-legged squat is still a struggle, start there. Elements builds the hip mobility, ankle stability, and squat strength the pistol depends on, through floor-based training with the Bear, Monkey, Frogger, and Crab.

Hi, I'm Ryan Hurst 👋
After a training accident ended his competitive gymnastics career, Ryan moved to Japan, where he spent close to 30 years training and competing in judo, kendo, and other martial arts until another injury made him rethink what training is for.
As Head Coach, he leads program design and teaches every week on our YouTube channel. His book, Stay On The Mat Forever, is aimed at helping you keep training for decades. He loves handstands, dogs, and hiking.